
Turn your lighting layout into a purchase list. Count pole positions and light heads separately, then match panels, batteries, mounts and foundation items to each assembly.
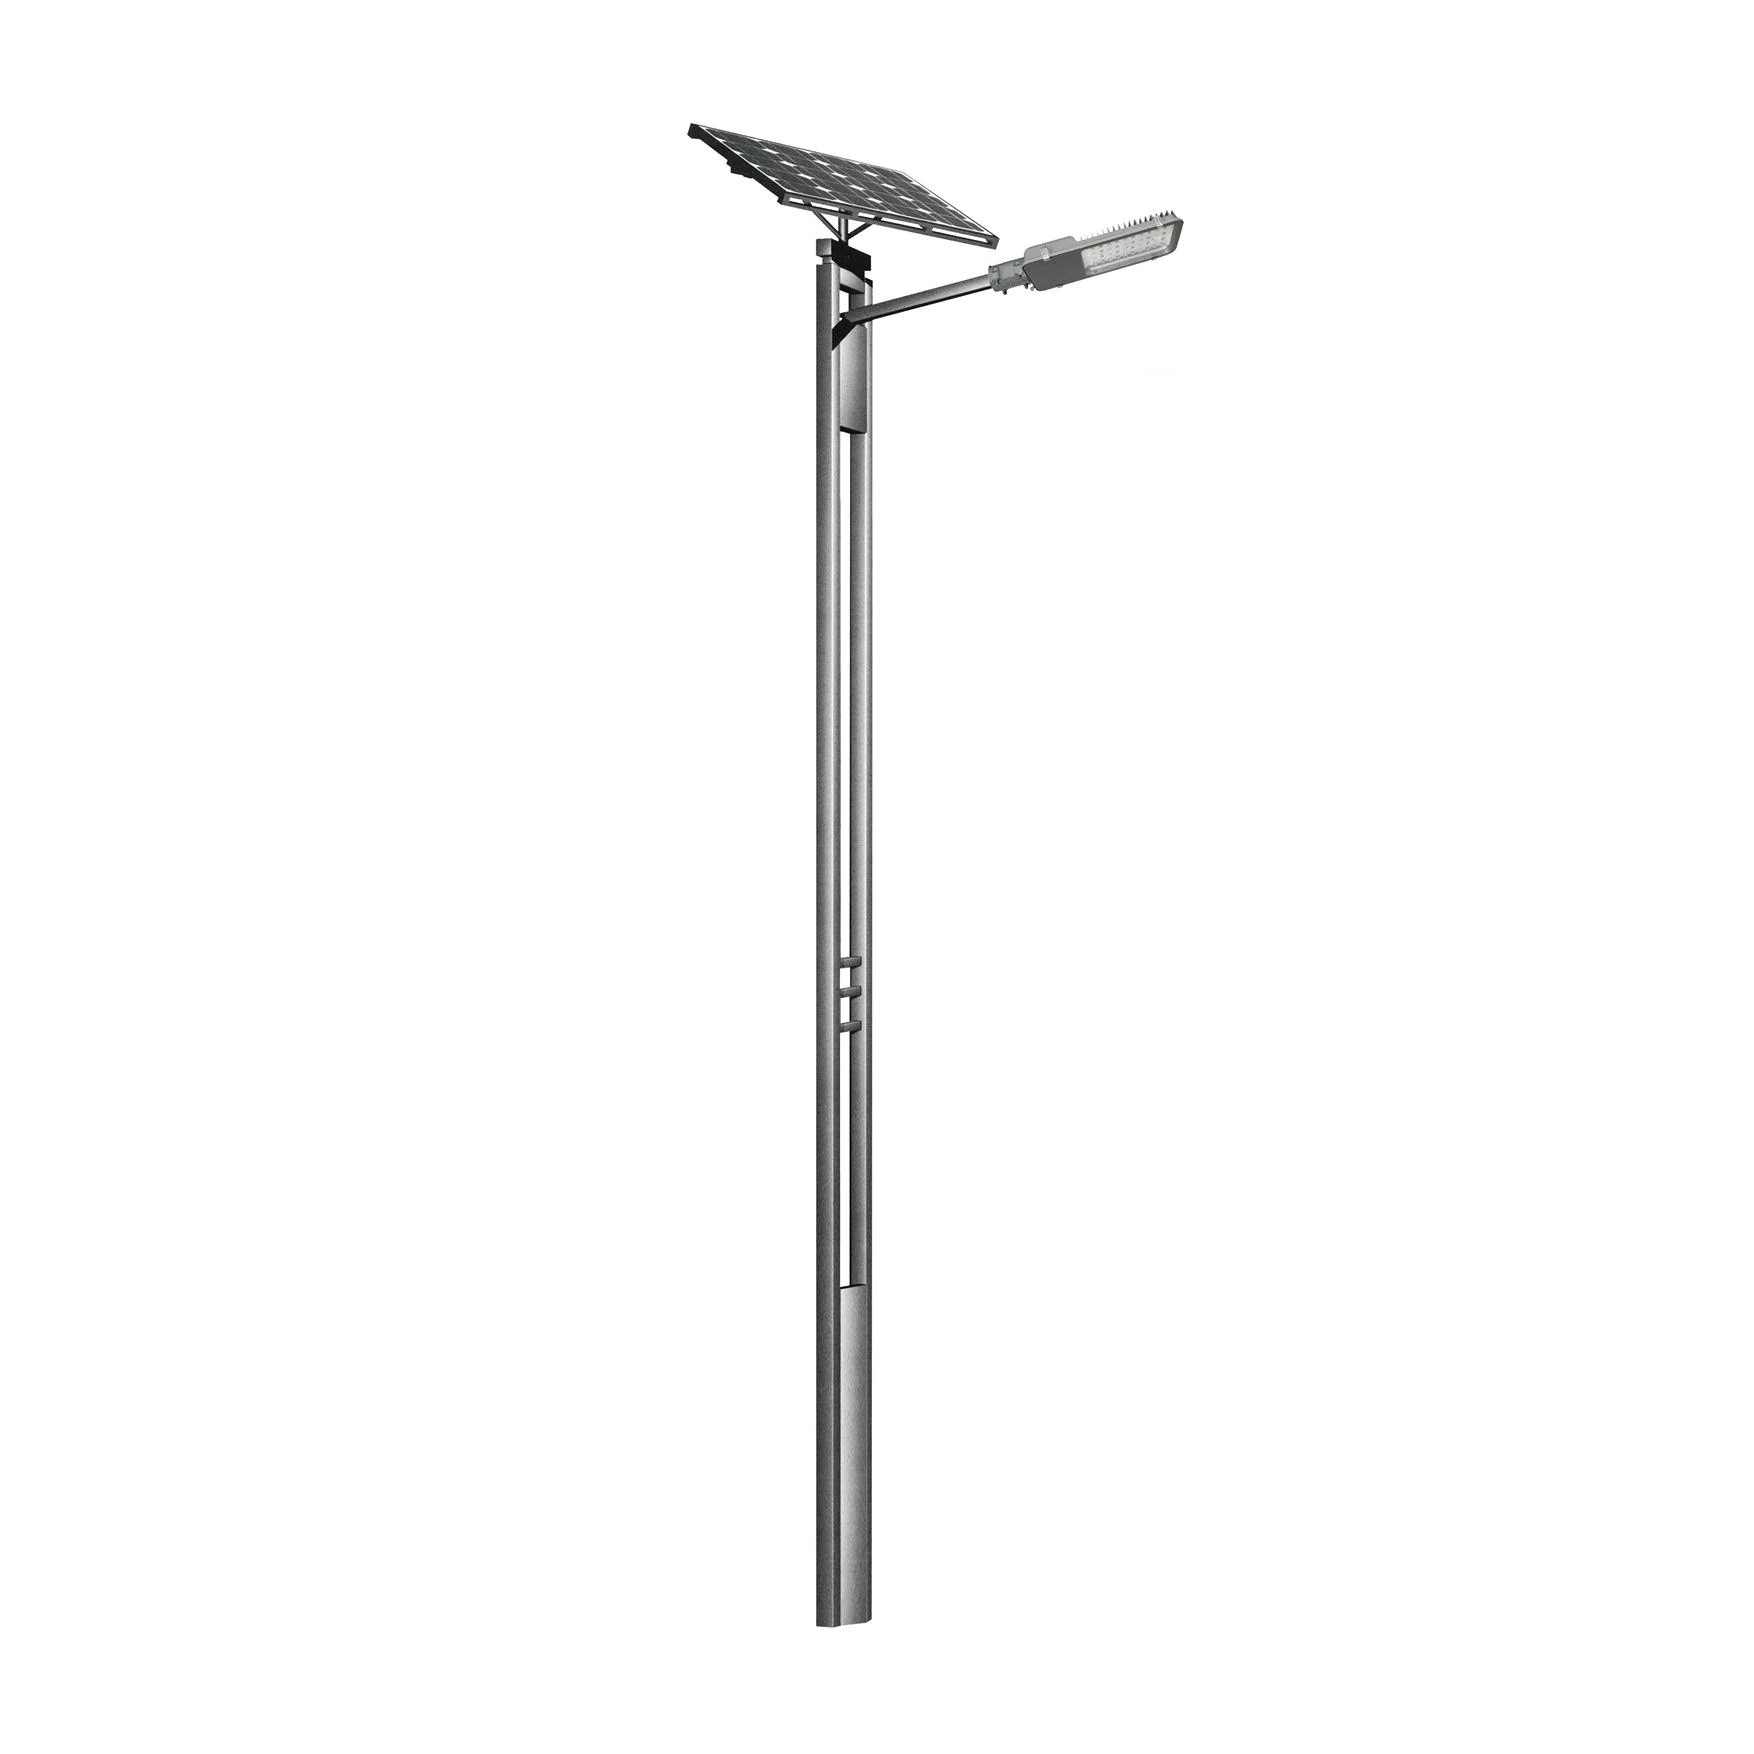
Mark single-arm and twin-arm locations separately on the plan. For twin heads, ask for a component count per pole and identify any shared power set.

Separate panel · One luminaire per arm
Use the single-arm layout for poles with one lighting direction. Confirm the 40 W starting point, panel and battery for the final lighting schedule.
Send first
Send the plan with single and twin heads marked, the intended light direction at each pole, and the civil items your team will supply. Keep the original BOQ line numbers.
What to check
Ask for a count per pole and an order total. The single and twin-arm versions may need different energy sets. Identify which parts each head uses before you compare suppliers.
Count poles, heads and power sets independently. As a quantity example, ten single-arm poles and two twin-arm poles give twelve poles and fourteen heads. Confirm whether the twin heads have separate or shared power sets before filling in the solar components. Treat each lamp direction as its own lighting task when the two sides lead to different areas.
| BOQ line | Worked quantity | Release check |
|---|---|---|
| Pole and foundation positions | 12 | Mark which positions carry one arm and which carry two. |
| Light heads and arm positions | 14 | List the direction and optic for each head. |
| Panel, battery, controller and wiring | By approved power diagram | Write shared or separate beside the twin-arm positions and size on the actual load. |
Check whether a separate head line is the breakdown of a complete pole kit, an additional supply line or a stock spare. The approved bill should show these as different lines so the receiving team knows how many cartons belong to one pole and which items stay in stores.

Two luminaires per pole · Separate solar panel
Use the two-arm layout where one pole must light both directions. Count the two heads separately and check them together against the solar and battery budget.
| Order item | Single arm | Double arm |
|---|---|---|
| Lamps | 1 head and 1 arm per pole | 2 heads and 2 arms per pole. Specify the optic for each direction. |
| Solar and wiring | List the panel, battery, controller, enclosure and leads. | List how many panels, batteries, controllers and cable sets are supplied. Check the combined load if any are shared. |
| Pole and site work | Confirm pole, base plate, anchors and template. | Confirm pole and bracket loads, base plate, anchors and template. |
Begin with the drawing that tells the installer where to set the poles. Mark each position and how many luminaires go on it. A single-arm pole normally has one light position, while a twin-arm pole may have two with different lighting tasks. Separate the position count from the count of heads, solar panels, battery systems and control channels. A purchase order for a number of complete lights leaves room for very different interpretations when the road contains a mix of single and twin arms. Give every assembly a clear count and connect it to the location schedule.
For example, if a layout has 18 single-arm poles and six twin-arm poles with both arms populated, there are 24 pole positions and 30 luminaires. Record whether each head gets its own charging and control system, or whether the approved design uses a shared arrangement on some poles. That choice controls the number of panels, controllers and batteries. It also affects the location of enclosures and the approach to maintenance. Add spares separately with their own descriptions. The goal is for the estimator, warehouse and installation crew to be able to count the same things from the same table.
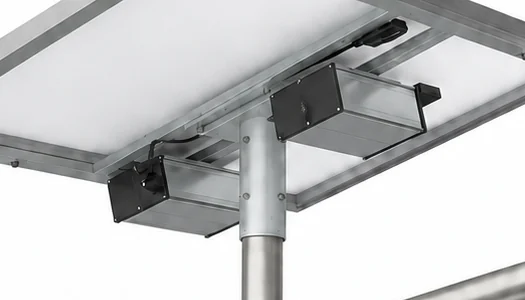
For a 6 m split solar street light, put the luminaire height in the lighting schedule and the shaft and arm dimensions in the pole schedule. Add the location of the panel, the enclosure and the fixing for each. An equipment schedule should identify the lamp configuration, associated battery and solar system, protective hardware and the relevant drawing or document revision. Ask the supplier to indicate the supply boundary line by line. For a new road, the estimate may include poles and bolts. A development using local poles and existing foundations will need a clear interface where those two packages meet.
Different suppliers may divide the supply in different places. One may include cables and plugs with the lamp and another only supply the components with short leads. Ask who supplies prepared cable lengths, protective conduit and any junctions. Identify what the site electrician must terminate and what the factory assembles. Confirm the finish and colour of the visible pole, panel support and enclosure if they are bought from separate suppliers. Align the labels on the offer, packing list and drawing ahead of time. Consistent labels help when deliveries are scheduled in phases or when a damaged kit needs a replacement.
Set the lighting task and operating schedule before comparing part sizes. Give the road width, pole spacing, mounting height, lighting requirement, relevant operating modes and the sections that differ. Ask each supplier to give the usable energy they expect, the basis for the charging design and the version of the photometry used in a calculation. Use one scenario for the base comparison. If an option extends the working hours, increases reserve or changes the beam, list it separately with the parts and documents that would change. A clear comparison avoids awarding a line that describes a different service.
Pin down what the quoted wattage refers to. Specify the luminaire electrical input at the stated mode and show solar module power on a different line. Put usable battery energy on its own line and identify the operating and charging assumptions that support that value. Then check that these entries came from the same proposed configuration. Comparing a supplier’s best lumen figure with another’s nominal electrical load, or a panel watt figure with a luminaire watt figure, will give a misleading answer. Ask for the actual part references when a final selection is due so the delivery can be matched to the proposal.
Take the approved pole base plate, anchor bolts and positioning template as one set. Confirm the dimension and orientation that the civil contractor will set out, including how the cable enters the pole. Ask which revision the supplier is using and which revision the contractor will build. In a split system the bracket and separate panel can introduce loads of their own. Make sure the reviewer sees the selected panel and bracket area and position alongside the luminaire and arm. The project’s responsible structural reviewer needs the site loads and foundation information to approve the design.
If the civil bases already exist, collect an as-built location record and field survey before committing to the fit. The condition, anchor layout, projection and cable-entry position are relevant to decisions about reuse. Keep any request to change holes or use a different bracket with the drawing revision and engineering review. The procurement team can make the offer easier to check by recording which drawing covers each connection. Before making foundations, have the pole vendor and civil team match the template to the plate. Before dispatch, ask the warehouse to check each supplied fastener and template against that same schedule.
For the first sample or delivery, pick one typical single-arm kit. Add a twin-arm kit if it appears in the actual order. Lay out the parts against the schedule and check that labels match the drawing before they are distributed to the site crew. Confirm the dimensions and access that matter for panel mounting, pole interface and battery service. Check whether a replacement controller or battery needs matching settings or connectors. If a packaging label looks like two options could be mixed up, correct the identification while repeat deliveries are still easy to control.
During the sample installation, record how the cable passes the planned entry, who checks the panel position, and which covers have to be opened to commission the unit. Have the electrician compare the selected controller setup with the approved operating schedule. When the sample lighting is checked at night, agree which point locations and mode the crew will use later. A problem found now can be traced back to a part or drawing without opening every kit. After changes, release the updated document and part list to each party at once so only one version is being assembled.
Put spare heads and other consumable or planned replacement items in a separate list. For each spare, specify the part reference or the documents that demonstrate interchangeability. A matching appearance does not show that the light uses the same output, control settings or connectors. A supplier can help by naming the fitted battery, controller, optic and relevant protection. On a job with two versions, record which pole IDs carry which version and which spare is intended for each. A small labelled table can save the maintenance crew a return trip with a part that does not fit.
Include installation and commissioning in the responsibility schedule. Identify who inspects parts on arrival, who checks the civil fit and who signs off a lighting measurement. Share the final pole schedule, wiring and controller settings with the operating team. If freight arrives in separate shipments, keep the outstanding boxes and spares listed against the same assembly references. Before signing acceptance, make sure omissions are classified correctly. A missing bolt in the supplier’s scope, a local cable yet to be fitted and an owner-requested spare that was never ordered require three different actions.
Line A for one head and one arm per pole. Line B for two heads and two arm positions per pole. Put the quantity of poles and the resulting head count beside each line.
Add panel, battery, controller, box, leads, brackets, base plate, anchors and template as separate rows. Mark shared power, separate power and items supplied by the installer.
Keep stock spares outside the installed head count. Check the first single-arm and twin-arm packs against the marked drawing, box list and connection diagram.
Put the BOQ line numbers, quantities and exclusions in Project details. If you have a drawing, include the revision and a link you are allowed to share.
If an offer lists 12 complete pole sets and 14 luminaire heads, ask whether the head line breaks down those sets or adds another supply item. Ask for an itemised schedule that puts each head on one pole line and labels spare heads separately. Use the same schedule to check the invoice and cartons when the goods arrive.
Use the offered scope to identify what is in the kit. A split lamp may be offered with its panel, battery and controls, while the pole, arm and foundation items belong to another package. Ask who supplies the panel bracket and connector leads and request the interface drawings where the two contractors meet. Record the complete scope against the installation position, even if several orders provide the components.
Give the two heads separate identification in the pole schedule and show the areas they serve on a plan. Ask the supplier to name the applicable optic and installed direction for each one, and to label them so the crew can distinguish them. Include the actual lighting modes, connections and energy design if the units share a system. This lets the shop and crew work from the same allocation.
Use the signed structural and civil documents for the specific pole assembly. Confirm that the current base plate drawing, anchors and positioning template match the foundation and cable entry. Give a named party responsibility for measuring and recording the template before the pour. Record approved changes before the crews continue. On an existing foundation, a field survey is the starting point for review.
Ask for the same dimming schedule and conditions on both, including the required full-output period, usable battery energy, charging basis and expected recovery after weak charging. Check that the claims apply to the same load type and fitted controller. If one supplier specifies the duration at a reduced mode and another at a different mode, ask each to restate it using the project’s schedule.
Start with the site, estimated pole height, draft layout and target working hours. State which parts the site normally buys locally and whether there are single or twin arms. Give the current quantity and identify which parts of the drawing may change. The first useful response is a supply list and a set of assumptions that the project team can confirm before final pricing and approval.
A shared battery can be considered after checking the combined load across each operating stage, controller output, cable paths and usable energy. Ask for the matching electrical diagram and an itemised supply list.
Ask for the packing list to identify the pole group, head count, brackets, controller and battery arrangement for each kit. Open one carton set of each type and match it to the drawing before site issue.
Use the approved electrical design to establish that. Add the two actual input schedules, check the controller channels and battery limits, and state the intended behaviour when one head is disconnected for service.
Send the layout, pole and luminaire counts, night schedule and which equipment or civil items will be supplied locally.
WhatsApp us