
Light a shaded path or entrance from the right position. Compare a separate solar panel location, the cable route and access to the battery before you commit to the layout.
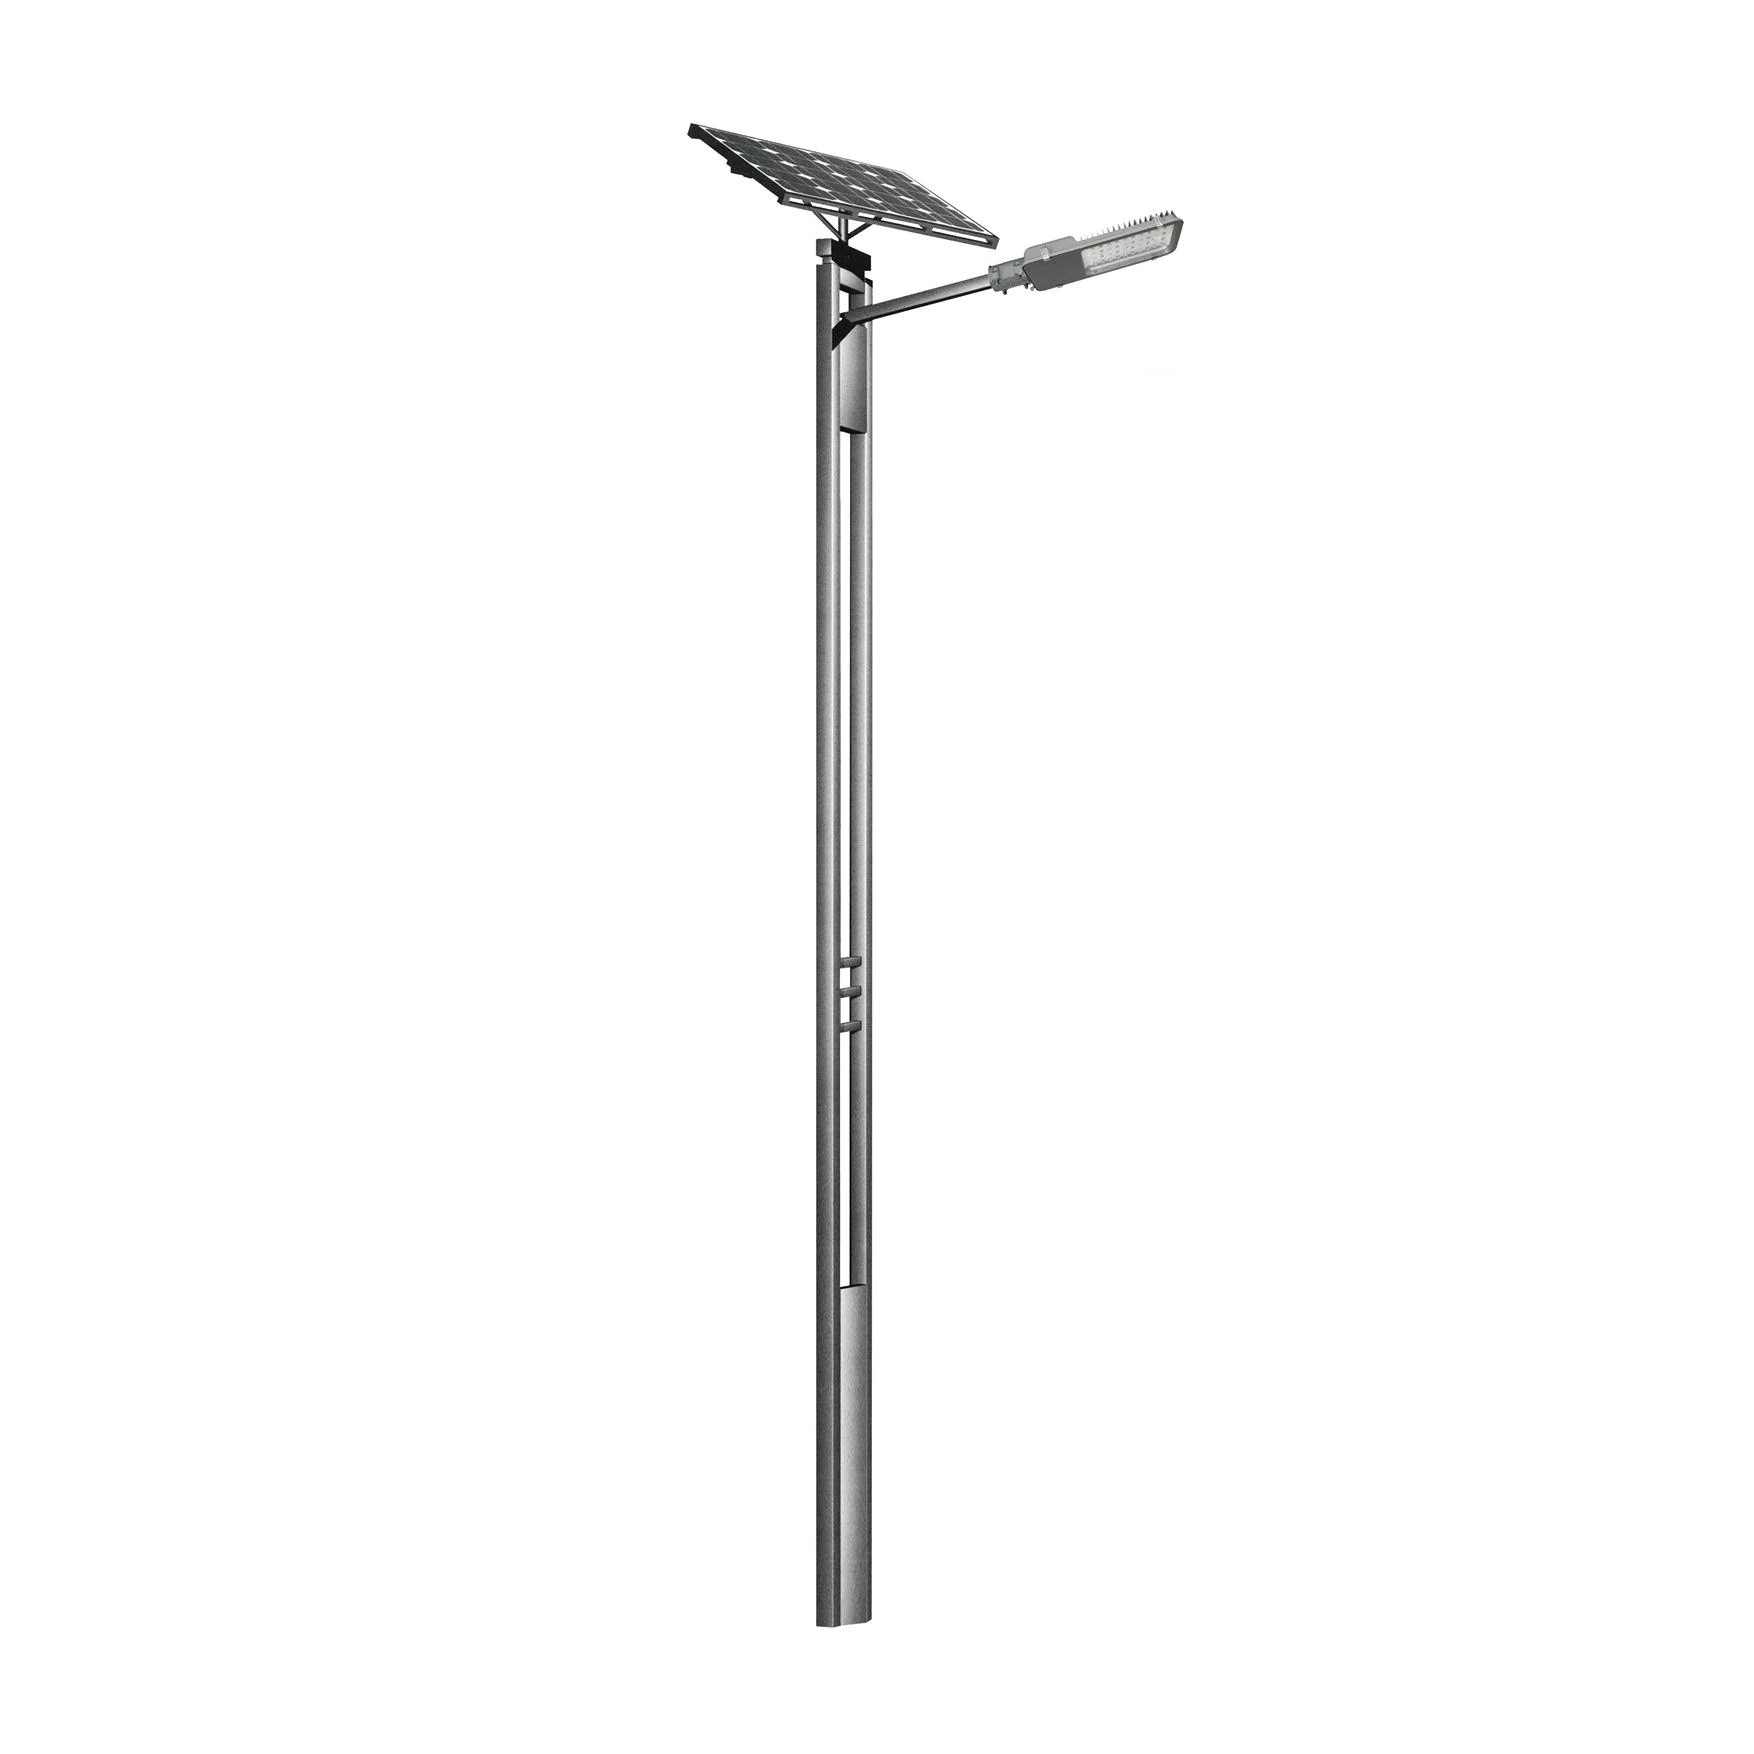
Mark the panel position and the shaded part of the day on a site photo. Use that position to discuss cable length and where the battery can be reached.

Separate panel · One luminaire per arm
Choose this layout when each pole needs one head and the panel needs to face a sunnier direction. Ask us to confirm a head for your 30 W starting point.
Send first
Mark the pathway, proposed light position and sunny panel spot on a photo. Add the cable distance if known, the receiving point and the name or role of the person who will look after the light.
What to check
Review the SL-PLUS single-arm arrangement for one direction. Ask for the selected head, panel and storage combination, plus a cable and enclosure sketch that works at the proposed positions.
Start with the SL-PLUS single-arm layout for one lighting direction. On a tree-lined entrance or a small site road, sketch the head, panel and battery positions separately. The head belongs over the route people use. Place the panel where seasonal shade is lowest and show how it connects to the controller. Mark both the vertical drop and the horizontal offset on the sketch.
| Site observation | How to use it |
|---|---|
| Only the top of the pole clears the shade | Check a separately aimed panel on an approved bracket, with the head aimed at the route. |
| The proposed panel and box are farther apart | Record the complete cable route. Ask the supplier to check cable size, voltage drop, connectors and glands. |
| The enclosure faces an access road or fence | Confirm the cover can open and the maintenance team has safe access from the intended side. |
Compare the layouts at the same lighting schedule and on the same site photo. A shaded panel with a larger nameplate may still harvest less than a better exposed panel. Ask for the actual cable schedule and a sectional sketch before the bracket and enclosure are released.
| Order item | Confirm in your BOQ |
|---|---|
| Lamps | One head and one arm per pole. Confirm the LED power, optic and sleeve. |
| Solar and wiring | Separate panel, battery, controller, enclosure, brackets and the cable run. |
| Pole and site work | List the pole, base plate, anchors and template on the quote. Name the party responsible for the foundation and installation. |
Follow the route after dusk. Mark the steps, junction or crossing where people struggle to see, then find the nearest practical pole position. Check the same point during the day. A tree canopy or low roof may shade the mounting position during hours when solar charging matters. A split system lets you light the required surface while locating the solar panel on an independently oriented bracket or at another approved point. Start with a sketch that shows both positions. The best location for the light is set by illumination and access. The best panel location also needs a useful solar window.
Check how shade changes through the year. A leafless tree can look harmless during one site visit, and a roof that casts little shadow in summer can cover the panel position in a different season. Mark the obstacle direction, approximate elevation and the hours you observed it. If the proposed panel sits next to the lamp support, check whether the support or lamp itself throws a shadow across the cells in the design period. A clearer position at a modest distance can be useful when it leaves space to work, route cables and keep the mounting arrangement within the approved design.
Compare three arrangements on the same sketch. The first is a separate panel and luminaire on the same pole. The second places the panel on another suitable support and routes the cable back to the system. The third moves the whole pole into better sun and uses a different fixture position or optic. Price and check the whole route for each. A roof looks convenient until the installer finds the cable has to cross a vehicle entrance or pass through waterproofing maintained by a different contractor. Record whose permission is needed for each fixing or cable segment.
When multiple entrances share a similar layout, mark the shaded side of each block separately. The apparently identical corners can face different directions. Keep an individually shaded corner off the standard installation list until its panel and cable position has been checked.
Measure the actual cable path from component to component, including vertical travel, bends and a service loop. Give the supplier each route length and where the cable is outdoors, inside a shaft or inside a protective conduit. Ask for the proposed cable type and size, connection details, allowable voltage drop and mounting limits for that configuration. A panel several metres away can be practical when the circuit and installation allow it. Long cable runs can also add cost, losses and failure points. A canopy mounting sketch and cable route make that trade-off clear before an order.
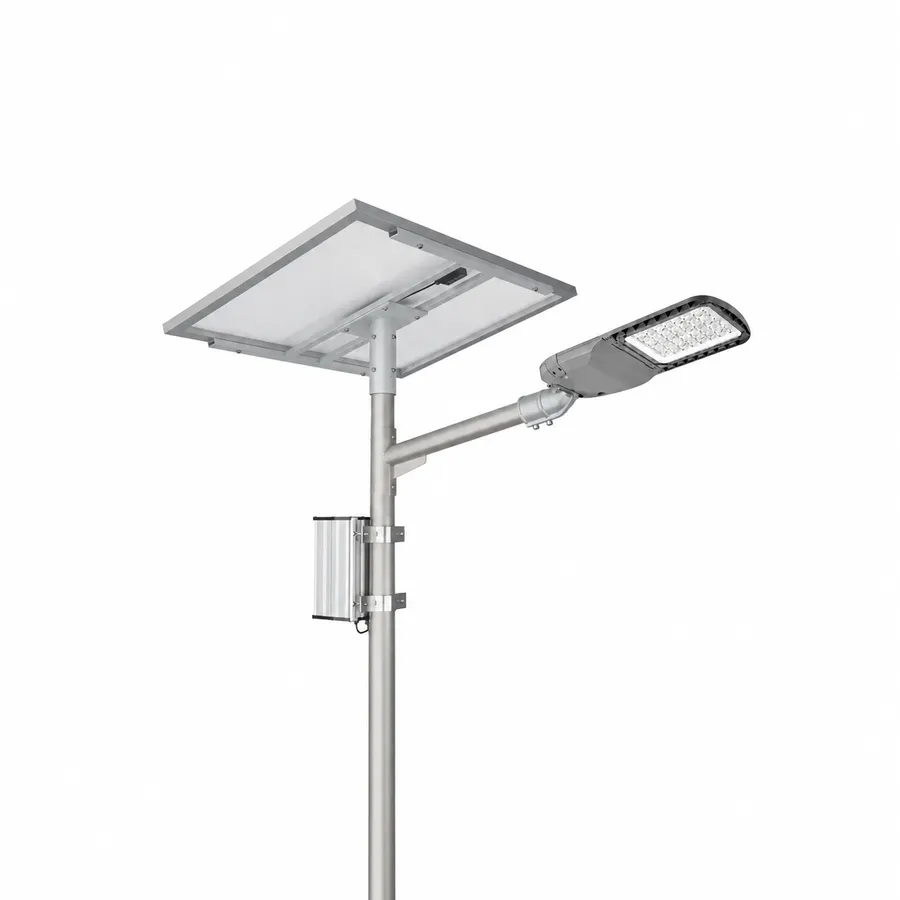
The same general equipment can look very different on site depending on where the battery and controller are placed. Ask for a drawing that identifies the panel, battery, controller, lamp and their connections, and make sure it shows how each cover opens. A high enclosure keeps equipment out of easy reach, while routine service may then require a lift. A lower enclosure can be reached more quickly, so consider who can approach it and how well the location is protected from damage, water and unauthorised access. Account for a door or gate that might obstruct the opening.
At a site beside planting or a pedestrian route, show the maintenance team where they can work without stepping into traffic or blocking an accessible path. Leave working room to remove the intended battery with its connectors and cover hardware. On drawings, give the installer entry positions and cable identification so that the battery and panel leads can be recognised without guesswork. Ask what can be replaced independently and how replacement parts will be identified. Agree who keeps a copy of the wiring and controller schedule so an electrician has something to check when the original installer is unavailable.
First establish the hours that need the agreed lighting level. A pedestrian connection to a residential car park may have regular demand at shift changes, while the late-night pattern can be quieter. Set the load for each period and give the supplier any required standby or sensor behaviour. For example, an illustrative schedule with a 30 W load for three hours and 12 W for seven hours totals 174 Wh at the load. Use the real selected equipment data for the project. The supplier should account for controller and wiring losses, usable battery energy and the expected charging conditions.
Ask for a short explanation of what happens after several weak solar days. The system must cover the requested service with the usable energy retained in the battery and then recharge in the available sun. A larger panel can help recovery if it has a clear solar window and matches the controller. Additional battery storage helps carry the load through a deficit when enough energy was available to charge it. For comparisons, ask both suppliers to show the same weather basis, reserve policy and dimming profile. This gives you a useful way to weigh changes to storage, panel location and operating hours.
In the lighting layout, give the designer the height to the light-emitting centre, the usable width of the path, obstacles and the distance to the surfaces that need light. If one pole is expected to serve a bend and a staircase or crossing, show them as distinct targets. Review where people will cross, whether a wall or hedge blocks the beam and which windows should receive minimal spill. A higher or differently positioned panel need not change the lamp position. Check the parts together again if the drawing requires a longer arm, an extra bracket or an offset near a wall.
A split arrangement can also reveal a worthwhile change to the first design. Suppose a lamp at the centre of a short covered path gives poor light around the exit. A mount near the exit may do a better job with the same solar panel position. Compare the two lamp locations using the selected photometry and the same operating mode. Ask the installer about the route while the designer checks the lighting. By doing these reviews together you can keep useful changes to the layout and drop options that would introduce difficult cable runs or hard-to-reach components.
Check the luminaire, panel, battery, controller, enclosure, mounting bracket, cable and connectors against a single supply schedule. Mark which items arrive in the kit and which are part of site works. If the local contractor makes the enclosure support or supplies cable, show the entry, fixing and connector requirements on the drawings they receive. If you reuse a pole, give the responsible engineer its condition, mounting details and all added equipment. The panel and its bracket introduce loads that depend on their area, position and site exposure. Use the project’s approved installation drawings and qualified local team for the actual installation.
Before repeated installation, review the first location with the electrician and installer. Compare the delivered labels and connections with the documents, check that the panel is aimed as planned and open the agreed service access. Measure any cable route that changed during construction and review it against the approved arrangement. During commissioning, confirm the charging and lighting settings against the specific controller instructions. Plan a night check for the path and a charging check under suitable daytime conditions. Keep the final connection details and cable route together with the installed component references for later fault finding.
Keep the head, panel, battery, controller, brackets and leads on the equipment lines. Show the pole, anchors, lifting, trenching or civil work on their own lines.
State where the carrier can unload and who handles the last section. If a project partner receives the goods, include their collection point and receiving responsibilities.
Leave the battery and controller references, cable labels and settings with the actual crew. Agree any training, basic spares and support arrangements before ordering.
For a shaded lane, draw two options with the head at the same pole: one panel on the pole and one at the nearest clear mounting point. Ask the installer to mark the full cable route, including entries and junctions, and the supplier to check voltage drop and controller compatibility. Choose the arrangement that can be inspected and repaired after the path and landscaping are finished.
Show the roof position, route, working access and the person responsible for the structure and waterproofing. Ask for agreement on the mounting method and cable entry. Check shading from parapets, roof equipment and other buildings during the relevant season. Compare the available space and installation work with a separate pole bracket before asking the installer to commit to the roof.
Ask for the usable charging energy and required nightly energy on the same basis. A larger battery can hold more energy when it has been charged. If the panel regularly cannot replace what the lamp uses, the system may still lose charge over consecutive days. Review a better panel location, the lighting schedule and the required recovery period before choosing a battery upgrade.
Have the installer document its length, conductor size, condition, route and termination. The supplier can then compare it with the selected circuit requirements. If the cable is inside a structure, also check practical access at each end and how much of it can be inspected. Include a replacement route in the site plan if its suitability cannot be established.
Mark both the finished-ground datum and the light-emitting centre in the site section. Give the solar panel location on a separate dimension. If a buyer requests a 5 m pole, ask whether that is a shaft dimension or the required light height. Write the chosen definition in the equipment list and lighting model so that the installer and designer use the same reference.
Send the location, a marked photo of the shaded lamp position and possible panel area, cable route length, approximate light mounting height and the hours that matter. If a pole or roof will be reused, include its drawing or photos. A simple marked site sketch helps identify whether the next decision is about the light, the panel position or access for installation.
If the design uses a long or nonstandard run, agree the cable and connector references, length and pinout before ordering the spare. Keep a labelled sample for the maintenance crew.
Identify where the cable enters, what may collect around the box, and how the crew will reach the connector. Ask for the protection and installation method for that enclosure and its glands.
First compare the light on the actual path with a differently aimed panel or panel location. Move the pole only after checking how that changes the crossing, vulnerable spots and the foundation location.
Send the location, marks for the shaded lamp and proposed panel, cable route, mounting height and night schedule.
WhatsApp us