
Quick Answer
When multiple solar street lights fail in one area, the first step is not to assume a product defect. A group failure may come from shared site conditions, repeated installation issues, shading, weak solar charging, water ingress, inconsistent controller profiles, sensor interference, or a batch-level component problem.
The correct review method is to map the affected pole numbers, compare failed poles with normal poles, check recent weather, inspect solar panels, review battery and controller status, confirm final settings, and document site conditions before replacing components.
For EPC and municipal projects, the key question is not only “which lamp failed?” but “why did this group of lamps fail in the same zone?”
Project Review Summary
| Item | Project Review Point |
|---|---|
| Main topic | Multiple solar street lights failing in one area |
| Best-fit buyers | EPC contractors, municipal teams, installers, distributors, project owners, and maintenance teams |
| Best-fit projects | Municipal roads, village roads, campuses, industrial parks, parking areas, compounds, highways, and distributed solar lighting projects |
| Core search intent | Whether multiple failed solar street lights are caused by site problems, battery/autonomy issues, installation errors, controller settings, or product batch defects |
| Main decision factor | Failure symptom, affected pole location, charging condition, controller profile, waterproofing, sensor behavior, and batch traceability |
| Main risk | Replacing parts before identifying the real group failure cause |
| Required checks | Pole mapping, weather review, solar panel input, battery status, controller protection, waterproofing, settings, and site conditions |
| Common mistake | Treating every group failure as a product defect without checking shared environment or installation factors |
First Check by Failure Symptom
A symptom-based check helps the site team choose the first review direction before replacing batteries, controllers, or LED modules.
| Failure Symptom | More Likely Direction | First Check |
|---|---|---|
| Several lamps are completely off | Low battery, controller protection, wiring, water ingress | Check controller status, battery voltage, recent weather, and connectors |
| Several lamps turn off early | Weak charging, autonomy shortage, aggressive profile | Check shading, panel soiling, dimming profile, and battery recovery |
| Several lamps are dim | Low battery, controller dimming profile, battery aging | Compare failed poles with normal poles and check charging input |
| Lamps fail after rain | Water ingress, wet connectors, cable sealing issue | Inspect cable glands, controller box, battery compartment, and connector points |
| Lamps work in sunny days but fail after cloudy days | Autonomy or solar charging shortage | Check rainy-season margin, panel input, battery capacity, standby/boost profile |
| Lamps behave differently in the same project | Controller profile inconsistency | Check timer mode, AUTO mode, motion mode, remote settings, and commissioning record |
| Lamps stay bright too often | Motion sensor false triggering or frequent real traffic | Check sensitivity, delay time, radar direction, and traffic pattern |
| Same batch fails in different site conditions | Product or batch issue possible | Check serial numbers, batch record, test reports, and supplier support |
This table does not replace field testing. It gives the first review direction so the site team does not jump directly to part replacement.
Why Multiple Solar Street Lights May Fail in the Same Area
A single failed lamp may be caused by one component, one wiring issue, one battery problem, or one installation mistake. But when several solar street lights fail in the same area, the review should start with the pattern.
Multiple lamps in one zone may share the same:
- Shading condition.
- Solar exposure.
- Dust or pollution level.
- Rainwater drainage condition.
- Installation team.
- Cable routing method.
- Controller profile.
- Motion sensor setting.
- Battery batch.
- Luminaire batch.
- Road traffic condition.
- Maintenance history.
This is why a group failure should be reviewed as a project issue first, not only as a product issue.
A localized failure does not automatically mean the supplier delivered defective products. It also does not automatically mean the site is the only problem. The correct approach is to collect evidence before deciding.
Product Defect vs Site Problem: First Review Logic
When several lights fail in one area, project teams usually ask whether the problem is a product defect or a site problem.
The answer depends on the failure pattern.
| Failure Pattern | More Likely Direction | Review Focus |
|---|---|---|
| Several lamps fail in one shaded road section | Site condition | Shading, solar panel orientation, charging input |
| Lamps fail after several cloudy or rainy days | Autonomy or charging problem | Battery status, dimming profile, rainy-season margin |
| Lamps fail after heavy rain | Waterproofing or connector issue | Cable glands, connectors, control box, drainage |
| Lamps behave differently after commissioning | Controller profile inconsistency | Remote settings, timer mode, dimming schedule, motion mode |
| Lamps stay bright too often | Motion sensor or traffic issue | False triggering, sensitivity, delay time, traffic frequency |
| Lamps in different areas from the same batch fail similarly | Product or batch issue possible | Battery, controller, LED driver, production traceability |
| One pole fails while nearby poles work normally | Local pole issue | Wiring, connector, battery, controller, site damage |
| All poles in one power-independent solar section behave poorly | Shared design or profile issue | Battery autonomy, solar input, controller setting, road activity |
The first review should identify whether the failure follows a location pattern, weather pattern, batch pattern, installation pattern, or setting pattern.
Common Site-Level Causes of Group Failure
1. Shading Reduces Solar Charging in One Road Section
Solar street lights depend on daily solar charging. If several poles are installed in a shaded section, they may all receive less energy than expected.
Common shading sources include:
- Trees.
- Buildings.
- Walls.
- Hillsides.
- Billboards.
- Utility poles.
- Overhead structures.
- Seasonal sun angle changes.
- New construction near the road.
A shaded group may work normally in the dry season or during strong sunlight periods, but fail after cloudy or rainy days because the battery cannot recover enough charge.
The project team should compare failed poles with normal poles in open-sun areas. If the failed poles are all in a shaded zone, the root cause may be solar charging deficit rather than defective lamps.
2. Dust, Mud, Leaves, Pollution, or Salt Mist Reduces Panel Input
Multiple lamps may fail in one area if solar panels become dirty or covered by environmental deposits.
Common causes include:
- Road dust.
- Mud splash.
- Bird droppings.
- Leaves.
- Industrial pollution.
- Coastal salt mist.
- Construction dust.
- Agricultural dust.
- Sand or dry-season deposits.
Panel soiling does not always shut down the lamp immediately. The problem often appears after several weak charging days, when the battery cannot recover to normal operating level.
Panel cleaning and charging review should be done before replacing batteries or controllers.
3. Rainy-Season Autonomy Was Not Enough
Some group failures happen after several cloudy or rainy days. In this case, the problem may be related to autonomy margin, not immediate component failure.
Possible reasons include:
- Solar charging input was lower than expected.
- Battery capacity was not enough for the selected profile.
- Timer mode was too aggressive.
- Motion boost was triggered too often.
- Standby brightness was too high.
- Rainy-season design assumptions were too optimistic.
- Panels were dirty before the rainy period.
- Shading reduced charging further.
For a detailed weather-related review, see why solar street lights stop working after cloudy or rainy days.
4. Controller Profiles Are Not Consistent Across the Project
Multiple solar street lights may fail or behave differently if controller settings are not consistent.
This can happen when:
- Some lamps use a different dimming profile.
- Some lamps remain in test mode.
- Some lamps use motion mode while others use timer mode.
- Delay time is different between poles.
- Standby brightness is not consistent.
- AUTO mode was not restored after testing.
- Remote control settings were changed but not recorded.
- Different installation teams used different profiles.
This type of problem may look like product instability, but it is often a commissioning record issue.
For profile logic, see solar street light dimming profile and battery autonomy.
5. Motion Sensor Triggering Is Too Frequent
Motion sensor mode saves energy only when the lamp spends enough time in standby brightness. If several lamps are triggered frequently, the battery may drain faster than expected.
Frequent boost may be caused by:
- Busy road activity.
- Parking entrance movement.
- Industrial shift traffic.
- Radar sensitivity set too high.
- Trees or animals.
- Adjacent road traffic.
- Reflective surfaces.
- Long delay time.
- High boost brightness.
- Low rainy-season charging margin.
If the failed area has more movement than other zones, the problem may be motion profile mismatch instead of product failure.
For mode selection, see motion sensor vs timer mode for solar street lights and solar street light motion sensor settings.
6. Nearby Artificial Light or Sensor Interference
Some solar street lights rely on day-night activation logic through a photocell, solar panel voltage signal, or controller profile. Nearby artificial light can sometimes affect activation behavior.
Possible interference sources include:
- Building lights.
- Flood lights.
- Advertising signs.
- Security lights.
- Vehicle headlights in specific angles.
- Existing street lights.
- Parking lot lights.
If several lamps in one section turn on late, fail to activate, or behave differently at dusk, the project team should check whether the day-night logic is being affected by nearby light sources or panel signal conditions.
7. Water Ingress Affects Several Poles After Rain
If several lamps fail after heavy rain, water ingress should be reviewed.
Risk points include:
- Cable connectors.
- Cable glands.
- Battery/control compartments.
- Controller housing.
- Luminaire seals.
- Solar panel junction areas.
- Pole-top cable entry.
- Drainage around the foundation.
- Incorrect installation of waterproof parts.
Group failure after rain may indicate repeated installation method issues, not only component defects.
The project team should check whether failed poles were installed by the same team, in the same zone, or with the same connector method.
8. Wiring or Connector Issues Were Repeated During Installation
Repeated wiring issues may affect multiple poles in the same area.
Examples include:
- Loose connectors.
- Reversed polarity.
- Poor crimping.
- Damaged cable insulation.
- Water entering connector points.
- Cable strain after pole lifting.
- Unsealed cable entry.
- Inconsistent controller connection.
- Poor terminal tightening.
If multiple poles were installed in one work shift or by the same team, repeated workmanship issues should be reviewed.
9. Day-Night Switching Logic Is Abnormal
A solar street light may have enough battery charge but still not turn on correctly if day-night logic is abnormal.
Possible causes include:
- Photocell obstruction.
- Solar panel voltage signal issue.
- Controller day-night threshold issue.
- Wrong test mode.
- Panel wiring problem.
- Nearby light interference.
- Incorrect controller profile.
- Cloudy daytime behavior misread as night.
If several lamps in one area fail to turn on at the correct time, the project team should check the day-night logic before replacing batteries or LED modules.
Possible Product or Batch-Level Causes
Although many group failures are related to site or installation conditions, product or batch-level issues should not be ignored.
Possible product-level causes include:
- Battery batch problem.
- Controller batch problem.
- LED driver issue.
- Connector quality issue.
- Waterproof sealing defect.
- Incorrect controller programming before shipment.
- Battery capacity mismatch.
- Wrong product configuration delivered.
- Transport damage.
- Component compatibility issue.
A batch issue becomes more likely when similar failures appear across different zones with different site conditions.
For example, if lamps from the same production batch fail in shaded and unshaded areas, dry and wet areas, and high-traffic and low-traffic zones, the project team should request batch traceability, test reports, and supplier support.
Product review should be evidence-based. It should use serial numbers, batch records, photos, test results, and comparison between normal and abnormal poles.
When to Suspect a Product or Batch-Level Issue
A site review should not become an excuse to ignore product responsibility. If the evidence points beyond one location or one installation condition, a product or batch-level review becomes necessary.
| Sign | Why It Matters |
|---|---|
| Same symptom appears across different zones | Less likely to be only one site condition |
| Failed lamps share the same batch or serial range | Batch traceability should be reviewed |
| Failures appear in shaded and unshaded areas | Site solar exposure may not explain all failures |
| Same controller fault appears repeatedly | Controller batch or programming issue may need review |
| Same waterproof defect appears on many units | Component sealing or assembly process should be checked |
| Normal installation and charging conditions are confirmed | Product-level review becomes more reasonable |
| Similar failures appear after similar operating time | Battery, controller, or LED driver consistency should be checked |
| Replacement parts solve the issue repeatedly | Original component batch should be reviewed |
If these signs appear, the project team should collect serial numbers, controller status, battery test information, photos, and installation records before requesting supplier batch review.
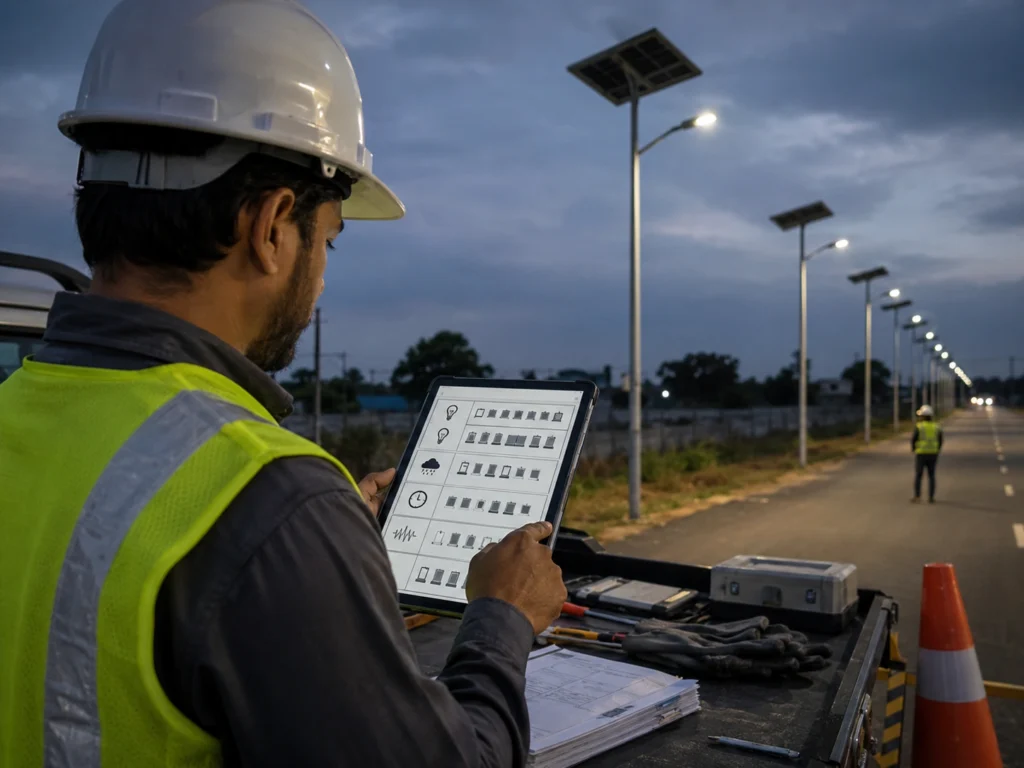
How to Troubleshoot Multiple Solar Street Lights Failing in One Area
Before resetting controllers, replacing batteries, or changing remote-control settings, record the original lamp status, controller indication, battery condition, and affected pole numbers. The original failure status is often more useful than the status after reset.
Step 1: Map the Affected Pole Numbers
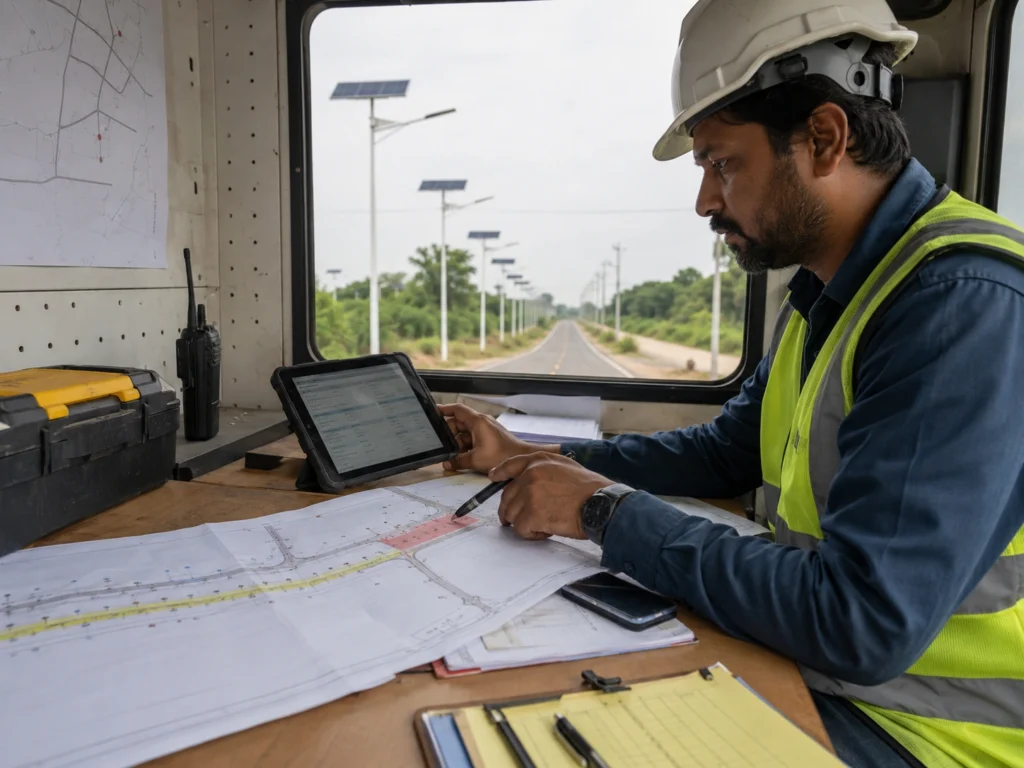
Start by recording exactly which poles failed.
Document:
- Pole number.
- Road section.
- Project zone.
- Failure time.
- Failure type.
- Whether the lamp is off, dim, flickering, or turning off early.
- Whether the problem happens every night or only after cloudy days.
- Whether nearby poles are normal.
A map or pole list can reveal whether the problem follows a location pattern.
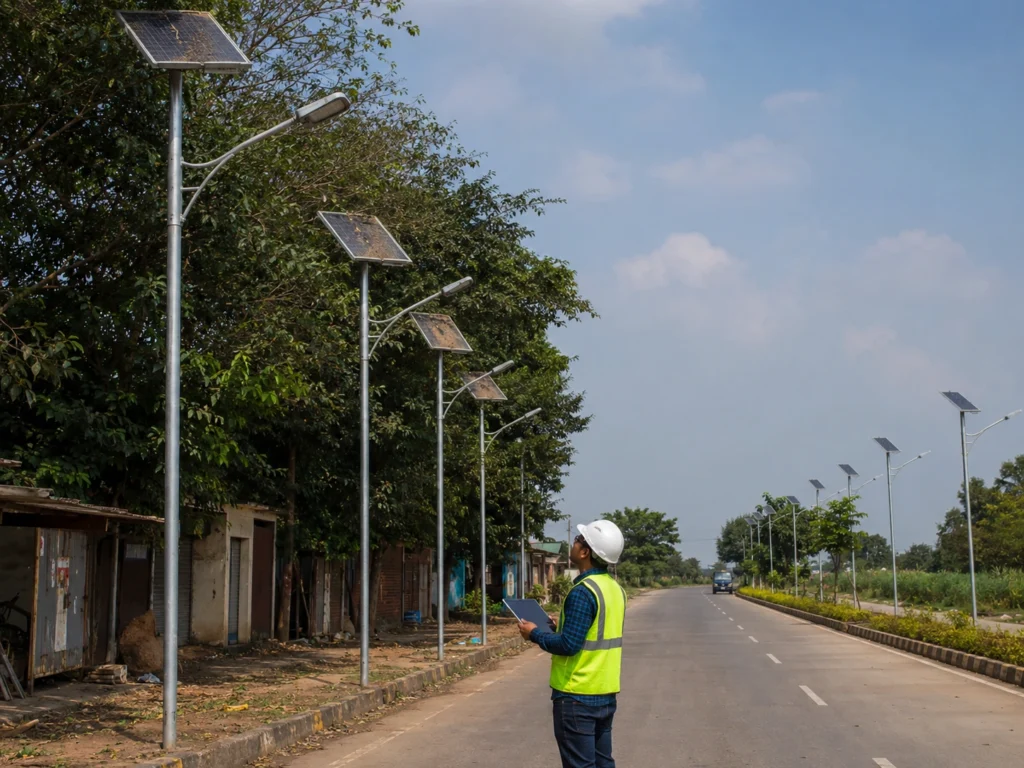
Step 2: Compare Failed Poles With Normal Poles
Compare failed poles with nearby normal poles.
Check whether they share the same:
- Solar exposure.
- Shading condition.
- Panel cleanliness.
- Battery type.
- Controller type.
- Controller profile.
- Sensor setting.
- Installation date.
- Installation team.
- Road activity level.
- Waterproofing condition.
The comparison helps separate site problems from product problems.
Step 3: Review Recent Weather and Autonomy Margin
Check recent weather before the failure.
Review:
- Cloudy days.
- Rainy days.
- Dust storms.
- Heavy wind.
- High temperature.
- Long low-sunlight periods.
- Seasonal changes.
If failures appear after weak charging days, the problem may involve autonomy, dimming profile, battery recovery, or panel input.
Step 4: Check Solar Panel Input
Inspect the solar panel condition.
Check:
- Dust.
- Leaves.
- Mud.
- Bird droppings.
- Shading.
- Panel angle.
- Panel orientation.
- Cable damage.
- Connector condition.
- Water around junction points.
If several panels in one area are dirty or shaded, the batteries may not recharge enough.
Step 5: Check Battery Status and Controller Protection
The battery and controller should be reviewed before replacing components.
Check whether:
- The controller entered low-voltage protection.
- The battery voltage or state of charge is low.
- The battery recovers after charging.
- The battery is older than other zones.
- The controller shows abnormal status.
- The profile consumes more energy than expected.
- The lamp returns to normal after full charging.
Low battery does not always mean defective battery. It may be the result of low charging input or high energy consumption.
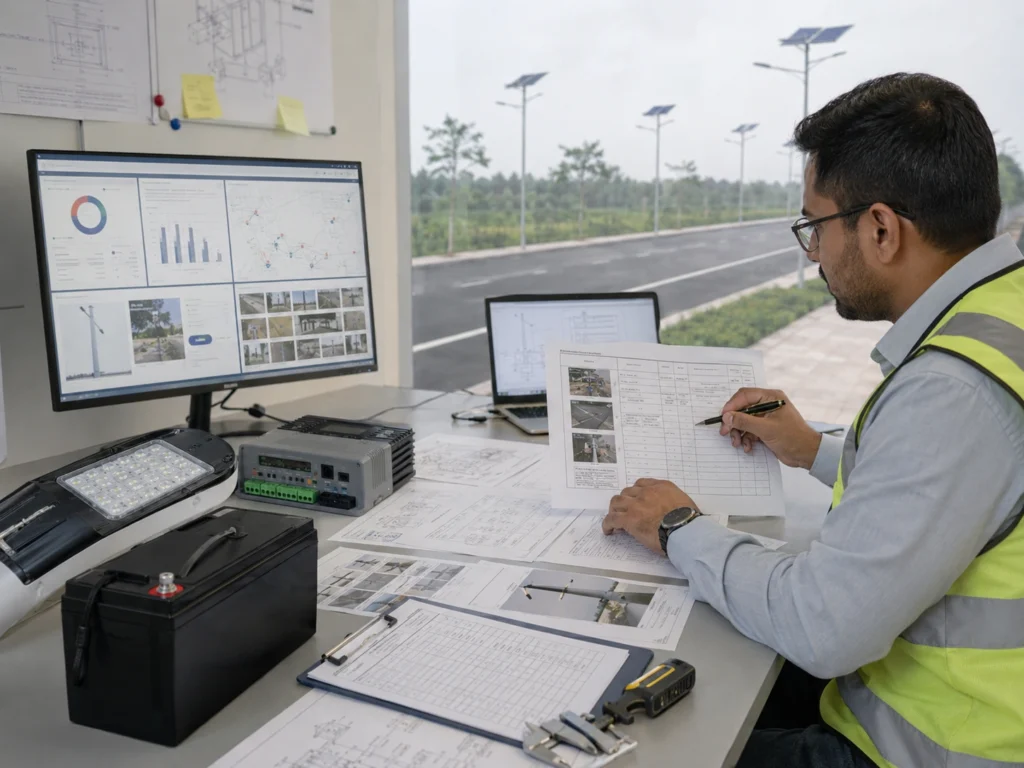
Step 6: Check Controller Indicators, Fault Status, or Platform Alarms
If the system has indicator lights, fault codes, or smart control, record the status before resetting.
Check:
- Charging status.
- Battery status.
- Load status.
- Controller fault indication.
- Communication status.
- Offline lamps.
- Low battery alerts.
- Abnormal dimming behavior.
- Group-level pattern.
Do not reset everything before recording the original status. The original fault status is useful for root-cause analysis.
Step 7: Review Controller Profile and Final Operating Mode

Check whether the final operating mode matches the approved project profile.
Review:
- AUTO mode.
- Timer schedule.
- Dimming stages.
- Motion sensor mode.
- Standby brightness.
- Boost brightness.
- Delay time.
- Sensor sensitivity.
- Day-night logic.
- Test mode.
- Final profile record.
If settings are inconsistent, the lamps may behave differently even when the hardware is normal.
For setup logic, see basic remote control setup steps.
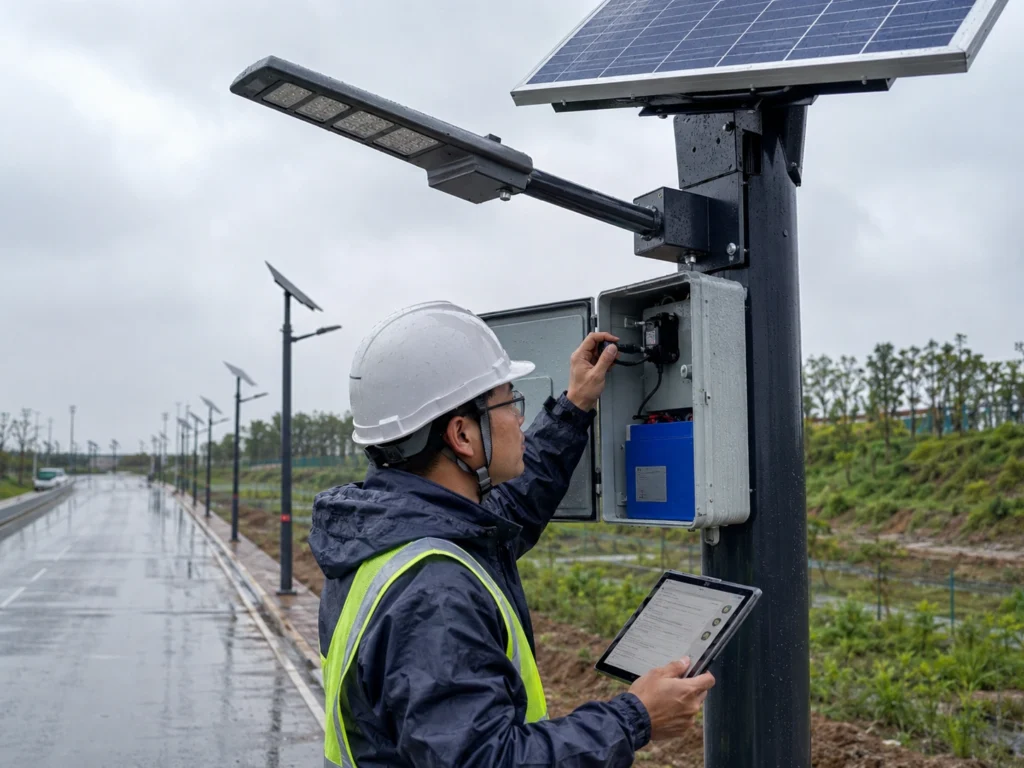
Step 8: Inspect Waterproofing, Drainage, and Connectors
For failures after rain, inspect waterproof points carefully.
Check:
- Cable glands.
- Controller box.
- Battery compartment.
- Luminaire seals.
- Panel cable entry.
- Connector locking.
- Drainage around the pole.
- Water marks.
- Corrosion signs.
- Loose or damaged cables.
If several poles show similar waterproofing issues, the project may need installation method correction.
Step 9: Test Day-Night Switching Logic
Check whether the lamp turns on and off correctly.
Possible test points:
- Does the lamp activate after dusk?
- Does it remain off during daytime charging?
- Does shading the panel or sensor simulate night correctly?
- Is the solar panel voltage signal reaching the controller?
- Is nearby artificial light affecting the lamp?
- Is the photocell blocked or contaminated?
- Is the controller still in test mode?
Day-night logic problems can look like battery or LED failure, but the root cause may be control logic.
Step 10: Separate Site Issue From Batch Issue
After collecting evidence, classify the issue.
| Review Result | Likely Direction |
|---|---|
| Same location, same shading, same weather exposure | Site condition likely |
| Same installation team, same connector method | Installation issue likely |
| Same controller profile error across many poles | Commissioning issue likely |
| Same product batch fails across different environments | Batch issue possible |
| Same road activity causes frequent boost | Profile mismatch likely |
| Same failure after heavy rain | Waterproofing or connector issue likely |
| One pole only, nearby poles normal | Local pole issue likely |
This classification helps decide whether to adjust site settings, repair installation, replace components, or request supplier batch review.
Step 11: Record the Corrective Action and Recovery Result
After correction, record:
- Pole number.
- Failure description.
- Original status.
- Site condition.
- Test result.
- Corrective action.
- Replacement part if any.
- Profile change if any.
- Recovery result.
- Date of follow-up check.
Without records, the same issue may repeat in another road section.
Corrective Action by Root Cause
After the root cause direction is confirmed, the corrective action should match the evidence. Replacing parts without correcting the real cause may only create repeated failures.
| Confirmed Cause | Corrective Action |
|---|---|
| Shading | Adjust panel position, trim shading source if possible, or revise autonomy expectation |
| Dirty panels | Clean panels and set a maintenance interval |
| Weak rainy-season autonomy | Reduce profile load, adjust dimming schedule, or review battery and panel sizing |
| Inconsistent controller profile | Restore the approved profile and record settings by pole number |
| Frequent motion boost | Reduce sensitivity, shorten delay time, adjust sensor direction, or use timer/hybrid mode |
| Water ingress | Dry and inspect the compartment, replace damaged connectors, and improve sealing method |
| Repeated wiring issue | Rework connector/crimping method and inspect all poles installed by the same team |
| Day-night logic issue | Check photocell, panel voltage signal, controller threshold, nearby light interference, and final mode |
| Possible batch issue | Collect serial numbers, test reports, photos, and request supplier batch review |
Corrective actions should be documented in the maintenance record so the same failure pattern can be checked across other project zones.
What Data Should Be Sent to the Supplier?
When asking the supplier for support, send structured information instead of only saying “several lights failed.”
Useful information includes:
- Project name or location.
- Number of failed poles.
- Pole numbers.
- Photos of failed and normal poles.
- Solar panel photos.
- Battery/control compartment photos.
- Controller status photos.
- Video of night behavior if possible.
- Recent weather condition.
- Road activity level.
- Controller profile.
- Motion sensor settings.
- Installation date.
- Whether the issue happened after rain or cloudy days.
- Whether nearby poles are normal.
- Serial numbers or batch numbers if available.
This information helps the supplier distinguish between component failure, installation issue, profile issue, and site condition.
How to Prevent Group Failures Before Handover
Group failures can often be reduced through better commissioning and documentation.
Before handover, project teams should confirm:
- Solar panels are clean and not shaded.
- Panel orientation and angle are correct.
- Battery and controller compartments are sealed.
- Cable glands and connectors are properly installed.
- Controller profiles are consistent.
- Motion sensor settings match road type.
- Day-night logic works correctly.
- Lamps have been tested before pole installation.
- Pole numbers are recorded.
- Handover records are complete.
- Maintenance team understands basic troubleshooting.
For formal handover, see the solar street lighting acceptance and handover checklist.
Standards and Tender Specification Notes
Multiple solar street light failures should be reviewed against the project specification, not only against product labels.
For tender and municipal projects, the project team should avoid judging performance only by wattage, battery size, or fixture appearance. The specification should connect the product configuration with road lighting performance, battery autonomy, solar charging condition, controller profile, and commissioning record.
Project documents may need to clarify:
- Road type.
- Pole height and spacing.
- Target lighting requirement.
- Dimming profile.
- Motion sensor profile.
- Battery autonomy days.
- Solar panel capacity.
- Waterproof requirement.
- Controller profile.
- Acceptance test method.
- Maintenance responsibility.
- Warranty support process.
For formal projects, DIALux simulation outputs, IES/LDT photometric files, datasheets, drawings, and BOQ documents can support review. Final acceptance should follow local municipal requirements, consultant review, and project-specific handover criteria.
Request a Multi-Pole Failure Review
Sunlurio can help EPC contractors, municipal project teams, distributors, and maintenance teams review multiple solar street lights failing in one area.
A project review can include:
- Failure pattern review.
- Pole number mapping.
- Site condition review.
- Shading and panel input review.
- Battery and controller review.
- Dimming profile review.
- Motion sensor setting review.
- Waterproofing and connector review.
- Day-night switching review.
- Batch traceability review.
- Commissioning and handover record review.
For project approval, corrective action, or handover documentation, Sunlurio can also support Engineering Support, IES/LDT photometric files, DIALux simulation outputs, datasheets and drawings, and tender documents and BOQ support.
To prepare a useful review, the project team can share pole numbers, site photos, solar panel photos, controller status, battery status, recent weather, road activity, installation date, controller profile, and whether the issue affects one pole, one zone, or multiple project areas.
Related Setup, Testing, and Commissioning Guides
For project teams troubleshooting multiple solar street lights failing in one area, these related guides may be useful:
- Why solar street lights stop working after cloudy or rainy days
- Solar street light dimming profile and battery autonomy
- Basic remote control setup steps
- Ground-level test before pole installation
- Solar street lighting acceptance and handover checklist
- Motion sensor vs timer mode for solar street lights
- Solar street light motion sensor settings
FAQ
Why are several solar street lights failing in the same area?
Several solar street lights may fail in the same area because they share the same shading, weak solar charging, rainy-season condition, installation method, controller profile, waterproofing issue, traffic pattern, or product batch.
Does multiple solar street light failure mean a product defect?
Not always. A group failure may be caused by site conditions, installation issues, inconsistent controller settings, motion sensor behavior, water ingress, or low charging input. Product or batch issues should be reviewed after evidence is collected.
What should be checked first when multiple solar street lights fail?
Start by mapping the affected pole numbers. Then compare failed poles with normal poles, check recent weather, inspect solar panels, review battery and controller status, confirm controller profiles, and inspect waterproofing and connectors.
Can shading cause several solar street lights to fail?
Yes. If several poles are installed in a shaded section, the solar panels may not charge the batteries enough. This problem often becomes visible after several cloudy or rainy days.
Why do several solar street lights fail after rain?
Failure after rain may be caused by low solar charging, water ingress, wet connectors, poor cable sealing, controller protection, or battery autonomy shortage after several weak charging days.
Can controller settings cause multiple solar street lights to behave differently?
Yes. If timer schedules, dimming profiles, motion sensor settings, or AUTO mode are inconsistent, lamps in the same project may behave differently even when the hardware is normal.
When should EPC teams suspect a product or batch issue?
A batch issue should be reviewed when the same symptom appears across different zones, failed lamps share the same serial range, failures occur in shaded and unshaded areas, or repeated controller, battery, waterproofing, or LED driver faults appear under normal installation and charging conditions.
Can motion sensors drain batteries in one road section?
Yes. If traffic is frequent, radar sensitivity is high, delay time is long, or false triggering happens, lamps may stay in boost brightness too often and drain batteries faster.
How can EPC teams separate site issues from product issues?
They should compare failed and normal poles, check location pattern, review controller settings, inspect site conditions, record battery and controller status, and check whether the same failure appears across different environments or only one zone.
What information should be sent to the supplier for support?
Send pole numbers, photos, controller status, battery condition, solar panel condition, recent weather, road activity, controller profile, installation date, serial numbers if available, and whether the problem affects one pole, one zone, or multiple areas.
