
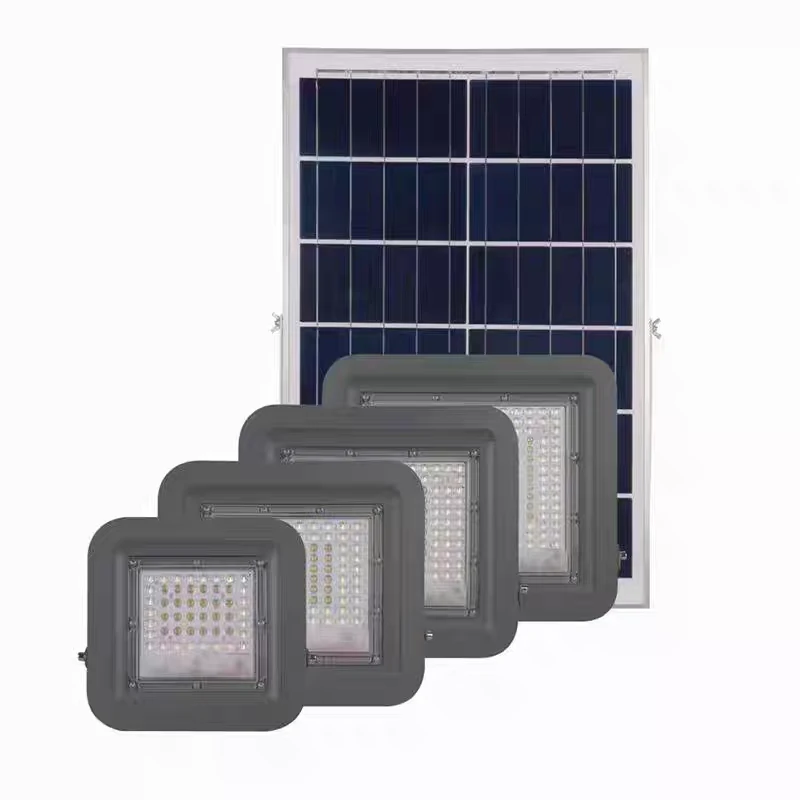
SL-FL Series Solar Flood Light
Light an entrance, yard or perimeter where running a new power cable would be difficult. The SL-FL has a separate solar panel, so the floodlight can face the area people use while the panel sits where it gets better daylight.
Send a site photo and mark the area you want to light. We can help you check the mounting positions and work out what to measure next.
Product Features
- Configuration-ready sizing: battery and panel options to match runtime expectations and local solar conditions
- DC 12/24V system: simplified system integration and troubleshooting
- Outdoor durability: IP66 protection with IK10 impact rating
- Use cases: perimeter, yard, site entrances, and security lighting
- Reduced onsite rework: configuration notes can be provided based on mounting and operating mode
Where Will You Use It?
Entrances
Check where drivers turn and people cross.
Yards
Mark paths and work areas used after dark.
Perimeters
Decide whether to light the fence or the patrol route.
At a vehicle entrance, mark where drivers turn and where people cross. For a yard, show the working areas and paths that need light after hours. Along a perimeter, show which side of the fence needs light and where glare could affect nearby windows. Send a photo or sketch with the approximate dimensions and mounting height if you have them.
At a gate, a bright fitting pointed toward the road may make it harder for drivers to see a pedestrian. For a yard, the useful question is often whether people can see the path between the work area and the exit, including the corners behind vehicles or stored materials. Along a fence, describe whether you need to see the fence itself or a wider patrol route. These are different lighting layouts, even when the areas have similar dimensions.
Start With a Site Photo
Take one photo from where people enter and another facing the area the light needs to cover. If a wall or pole is already available, include it in the frame. A rough sketch showing the distance from that mounting point to the far edge is useful. Mark any gate, loading bay or walkway that needs particular attention.
Tell us the country and town, and mention anything that gets in the way of sunlight or mounting. A tree that shades the wall in the afternoon, a roof edge that blocks the panel or a gate that needs clear visibility when it opens can change the layout. We can help you identify the next measurement to take before you commit to a model.
How Much Light Does Your Site Need?
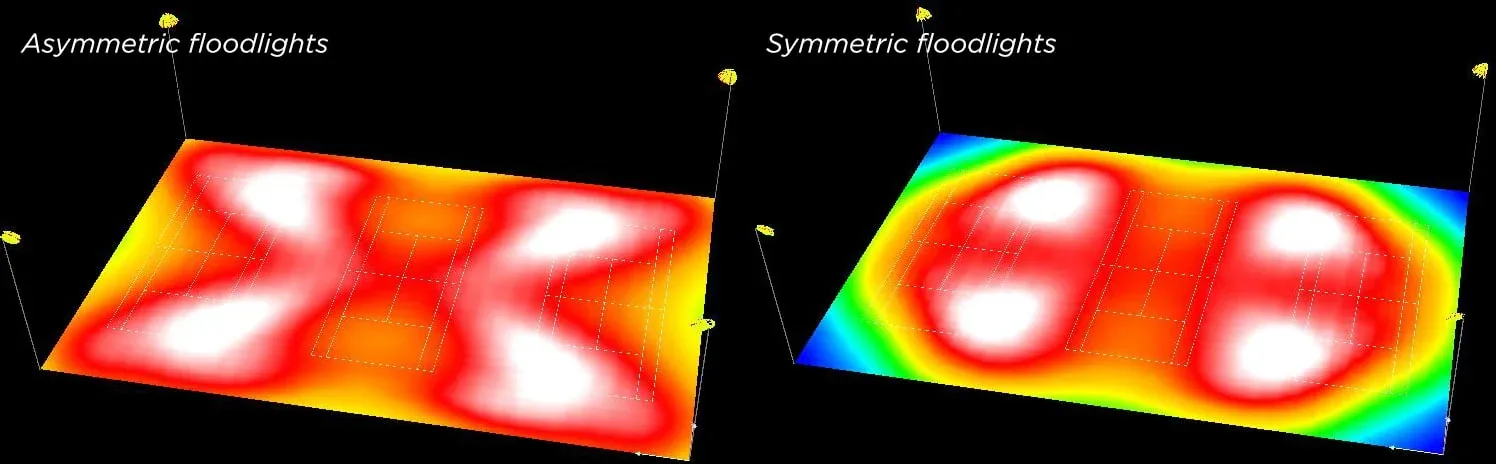
For a site with a lighting specification, tell us where the values apply. An average across the yard can hide a dark corner, while a minimum target applies to the lowest reading in the specified area. Mark where the mounting points are and where lights cannot be installed. If a layout study is needed, the photometric file should match the proposed fitting and optic, and the drawing should show the mounting height and aiming used in the calculation.
Plan the Hours You Need Light
Tell us when people need full light and when lower output is useful. A busy gate may need more light during arrivals and less during a later patrol. We use that schedule to review the energy demand. When comparing offers, ask both suppliers to show the brightness schedule used to size their equipment.
Write the required schedule as a sequence of time periods. For example, you may want full light while vehicles are moving, lower light during quiet hours and a higher level again when the morning shift arrives. If the site operates every night, say so. We can use the schedule to review the configuration and show the assumptions behind it. If dimming is proposed, confirm with the site team that the lower level is still useful where people walk.
Plan for Shade and Cloudy Days
Show us where trees or buildings shade the proposed panel position. If the owner asks for backup across several nights, tell us how bright the lights need to be during that period. We review the nightly demand, usable battery energy and available sunlight together. A different panel position or dimming schedule can change what you need to buy.
When a specification says “three nights of backup,” check how much light the owner expects on each night and whether any solar charging is assumed during that period. Ask how the system would recover after poor weather. A larger battery can store more energy, but the panel still has to replace what was used. Panel direction, tilt, seasonal shade and the hours of useful sunlight matter in that review.
| Series | SL-FL Series (Solar Flood Light) |
| Power Range | 20W–150W (by configuration) |
| Luminous Efficacy | 180–200 lm/W (by configuration) |
| Input Voltage | DC 12/24V |
| Battery Spec | LiFePO4 lithium, 230Wh–1843Wh or customized |
| Solar Panel Spec | Monocrystalline silicon, 50–400W or customized |
| IP Rating | IP66 |
| IK Rating | IK10 |
Technical details to confirm for your site
- Light output: Confirm the lamp input and light output in lumens for the proposed configuration. Send the target lighting level and mounting height so we can review coverage.
- Battery and panel: Compare battery voltage and capacity together. Ask how much of the nominal energy is usable, then check the panel rating, seasonal shade and nightly brightness schedule.
- Mounting and supply: Send bracket dimensions and the proposed panel position so we can review the mounting arrangement, cables and spares.
Send your tender specification or equipment list so we can match the configuration and work through each requirement with you.
Can I Use My Existing Pole or Bracket?
Send a site photo, the mounting height and the area you need to light. If you are replacing an existing flood light, include a photo and dimensions of the bracket so we can check whether it can be reused.
For a solar installation, show us where the panel can get unobstructed sun and tell us when the light needs to run. We can review the mounting setup with you and share the installation instructions for the selected configuration.
If you plan to keep the existing bracket, photograph it from the front and side with a tape measure in view. Measure the mounting surface and any existing bolt spacing. Also show where the solar panel could be supported and how the cable would reach the light. The installer should confirm that the mounting surface can carry the proposed equipment and that the mounting position is accessible for service.
Compare the Equipment Before You Compare the Price
Ask for the lamp’s actual input power and light output, the panel rating, and the battery voltage and capacity. Compare energy in watt-hours and ask how much the proposed system can use. Check whether brackets, cables and spares are included. Tell us what your installer supplies locally so we can identify the connections they need to make.
When two quotes look similar, check that both cover the same lighting area and schedule. Ask where the panel and battery ratings appear and whether the listed wattage describes the lamp input or the solar panel. Then check the boundaries of supply. If one offer includes a panel bracket, outdoor cable and replacement parts and the other leaves them to the installer, compare the cost of completing the installation, not just the unit price.
What Should Be on Your Supply List?
- Equipment in the offer
- Check that the quotation names the floodlight, solar panel, battery and controller for the proposed configuration. Ask the supplier to state where the controller is fitted and how the components are matched.
- Items to list separately
- Confirm the brackets, cables, connectors and spare parts you want included. Ask for quantities and cable lengths so your installer can check the list against the site layout.
- Items your site team can provide
- If you plan to reuse a pole or wall bracket, identify it in the equipment list. Agree who provides new fixing hardware and who handles local installation before comparing the total cost.
Get the Right Documents for Your Tender
Send the relevant specification pages, equipment list and submission deadline. We can review which datasheet, photometric file and mounting information match the proposed configuration. If the owner specifies a lighting level, tell us whether it is the minimum or the average, and which areas it covers.
For a tender, list the documents the reviewer will check and show which item in the equipment schedule each document supports. A datasheet should describe the proposed equipment. The layout and photometric files should match the luminaire and distribution being offered. If different parts carry different warranty terms, identify the terms for the relevant equipment in the offer so the buyer can compare them clearly.
Check the Sample Before Production
Ask for a sample that matches the configuration you intend to compare. Check the housing material and dimensions, bracket connection, panel, battery and any labels against the equipment list. If the sample is a different configuration, record the difference before using it as a production reference.
Use the approved sample and component list together when reviewing the production order. If a component needs to change, we discuss what it affects and seek agreement before using it, including owner approval where the project requires it. That gives the buyer and installer a shared reference when the equipment arrives.
Make Delivery and Handover Easier
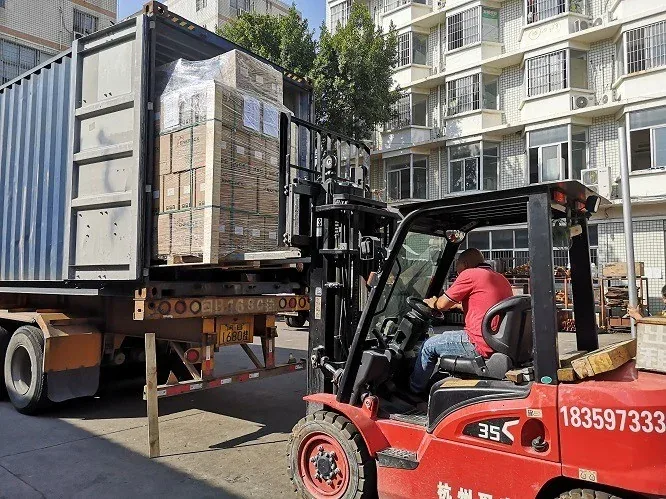
Agree the receiving checklist before the equipment ships. The installer needs to know which light goes with which panel, battery, cable and mounting parts. Labels and the packing list should let the receiving team match the packages to the equipment schedule without opening every carton. If parts are going to different sites, agree site markings before dispatch.
Keep the agreed lighting schedule and installation information with the approved equipment list. That gives the maintenance team a reference if someone changes a setting, if a light stops working before dawn, or if a replacement part is needed several seasons later. If the owner uses a formal acceptance checklist, send it before production so we can review what should be supplied and what the installer needs to record.
Frequently Asked Questions
How do I choose the right battery and panel configuration? +
Will it run more than 12 hours every night? +
Why do DC 12/24V systems matter for installation and troubleshooting? +
Is the SL-FL series suitable for harsh outdoor environments? +
What documents can you provide for deployment and approvals? +
Get in touch with us
Send Your Project Information for Review
Our team will review your project information and respond with the appropriate configuration path, document requirements, or next review step.
- Linrui Business Plaza, Huangdao District, Qingdao,China
- 0532-83978013
- 0532-83978023
- 0086-18653218098
- info@sunlurio.com
- Mon - Fri: 9:00am - 6:00pm