
To repair a solar street light system, start with (1) battery voltage under load, (2) controller status/settings, (3) solar panel output at midday, and (4) polarity + waterproof connectors. Most “dead lights” are caused by loose connectors, wrong controller parameters, or a weak battery—not the LED lamp.
30-Second Diagnosis Path (Field Order):
- Check battery voltage under load (light ON test)
- Check controller error/status + lighting mode
- Check panel output at midday (clean/shading/wiring)
- Check polarity + waterproof connectors (corrosion/loose terminals)
- Check LED driver output and lamp head
Looking for a DIY backyard light fix?
This guide focuses on commercial / municipal solar street lights used in projects (EPC / roadways / public lighting). For residential wall-mounted lights and DIY setups, see: DIY Solar Light Troubleshooting Guide.Who this guide is for
This guide is written for EPC technicians, maintenance teams, and municipal field staff handling commercial solar street lights, not decorative garden lights.Need faster field support?
If your team is troubleshooting multiple poles or a live road project, you can request engineering support here.
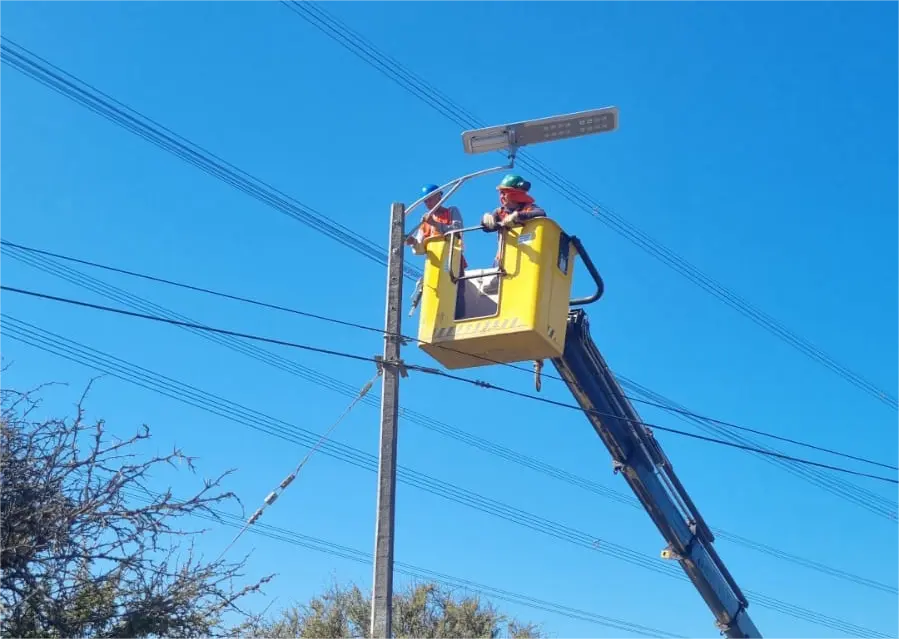
Solar street light repair should follow the energy path — battery, controller, panel, wiring, then LED head — so you fix the real failure point instead of guessing. In this guide, I’ll walk you through installation checks, wiring, troubleshooting, and maintenance based on real field experience for EPC teams and site technicians.
Introduction to Solar LED Street Lights
Solar LED street lights work as independent systems powered by sunlight, using panels, batteries, controllers, and LED lamps to deliver night-time illumination.
For repair work, this matters because one weak component in the energy path can shut the whole system down.
The system includes five main parts: the solar street lighting system panel (energy capture), battery (storage), controller (management), light source (illumination), and pole (support structure).
Neglect one part, and the whole system suffers — I’ve seen batteries die in a year just because the solar street light controller wasn’t configured right.
Regular maintenance and quick troubleshooting make all the difference between a reliable light and a dead pole in the dark.
Precautions Before Installing Solar LED Street Lights
Before installing, ensure proper site preparation, safe procedures, and technical compliance.
In my first big project near Kisumu, rushing installation without safety checks caused half the poles to tilt after one rainy week — simple errors with big costs.

Site Preparation and Safety Guidelines
Choose calm, sunny weather and inspect your site carefully before installation.
Mark pole positions clearly, set aside tool areas, and plan for waste disposal. Workers should have basic electrical and height-safety training.
Never install when it’s raining or windy — wet cables and slippery ladders are a dangerous mix.
Professional Guidance and Compliance
Only trained technicians should supervise the installation.
Follow electrical standards (IEC 60598-2-3, or local codes). Don’t rely on guesswork — even a small polarity mistake can fry your controller. Professional oversight saves time and prevents warranty disputes later.
This section is included mainly to help identify installation-related causes of poor performance. If the light is already failing in service, move first to the troubleshooting checklist below.
Recommended Installation Parameters for Solar LED Street Lights
Each wattage has its practical pole height, spacing, and road width range — balance uniformity with efficiency.
Inconsistent spacing often leads to uneven brightness or wasted energy.
Note: The table below is a practical starting point. Final pole height/spacing should be verified by lighting simulation (road width, mounting height, optics/IES distribution, and target uniformity). Use it to avoid obvious mistakes, then confirm with project geometry.
| Power (W) | Pole Height (m) | Road Width (m) | Installation Distance (m) |
|---|---|---|---|
| 5W | 3 | 3–4 | 10–15 |
| 8W | 3 | 3–4 | 10–15 |
| 12W | 3 | 3–4 | 12–18 |
| 15W | 4 | 4–5 | 15–20 |
| 20W | 5 | 5–6 | 25–28 |
| 30W | 6 | 6–8 | 30–35 |
| 50W+ | 7–8 | 7–10 | 30–35 |
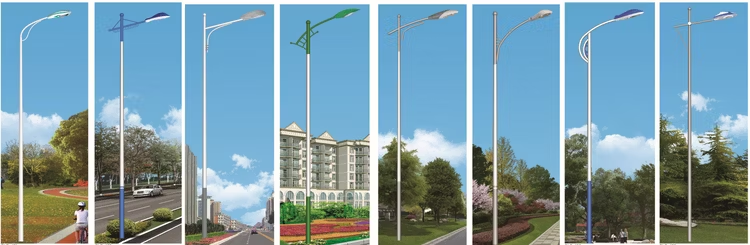
One-Sided vs. Double-Sided Layouts
Choose layout type based on road width and required illumination.
For narrow roads (under 6 m), one-sided layout works fine. For main roads, use double-sided or staggered layouts to reduce dark zones.
Keep pole height proportional to road width — it’s not one-size-fits-all.
Step-by-Step Solar LED Street Light Installation Guide
Many repair calls actually come from poor first-time installation. The steps below are included because fixing the root cause often starts with checking whether the system was installed correctly in the first place.
Installation success depends on careful preparation, alignment, and electrical safety.
Skipping small steps — like leveling the anchor cage — can cause misalignment that’s hard to fix later. Follow this sequence carefully.
Step 1 – Foundation Preparation
A stable base ensures pole safety and long-term durability.
Survey soil condition, confirm bearing capacity ≥ 2KN/m². Excavate and drain water if necessary. Install the anchor cage level with the planned height and mark alignment directions.
For structural coordination and footing basics, see also light pole foundation design basics.
Step 2 – Concrete Pouring and Curing
Align bolts correctly before concrete sets.
Pour concrete slowly, tamp air pockets out, and keep bolts exposed. Curing takes at least 72 hours — don’t rush. Weak foundations cause wobbling poles and dangerous tilts.
Step 3 – Light Pole and Arm Installation
Handle poles carefully to avoid paint damage or scratches.
Thread wires through the pole before lifting it. Secure lamp arms with bolts, check orientation. A slight tilt misalignment looks bad and wastes light coverage.
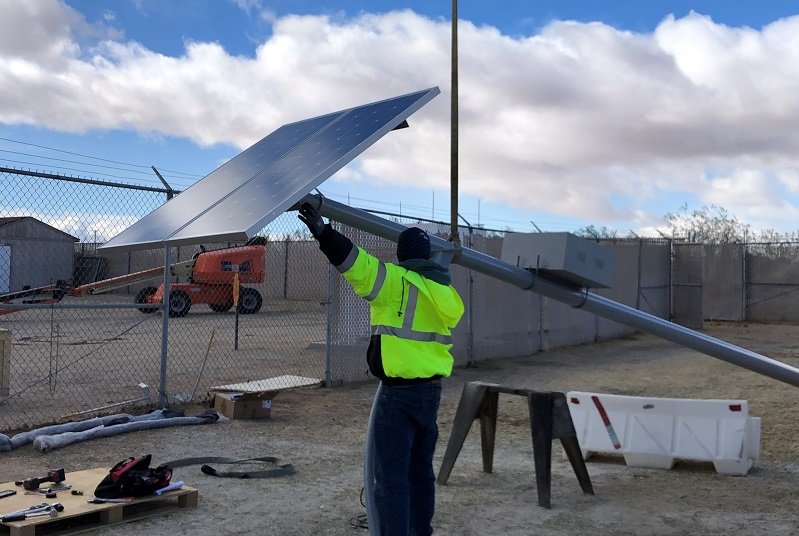
Step 4 – Solar Panel Installation and Orientation
Panels must face true south (in northern hemisphere) for maximum sunlight capture.
Use a compass or phone app to confirm direction. Adjust tilt angle to match local latitude — that small detail improves generation. Tighten all clamps firmly.
Step 5 – Battery Pack and Controller Setup
Correct wiring sequence is essential for safety.
Connect LED light → battery → solar panel, ensuring correct polarity. Seal connectors with waterproof tape or gel. Poor sealing invites corrosion that kills systems within months.
If your project uses higher-efficiency, lower-voltage battery platforms, see also 3.2V low-voltage power architecture.
Step 6 – System Testing and Debugging
Test charging and lighting before final tightening.
Match controller voltage (12V/24V) to panel and battery. Use remote or display to test brightness, motion sensor, and timing modes. Don’t skip this — debugging saves costly returns.
Snippet Tip:
Q: How to install solar LED street lights?
A: Prepare the foundation, mount pole and arm, install panel facing south, connect wiring in correct order, then test voltage and brightness.
Wiring Instructions for Solar LED Street Lights
Proper wiring prevents short-circuit damage and reduces repeat failures.
In field repairs, loose terminals, reversed polarity, and poor waterproof sealing are among the most common root causes of “dead” or unstable lights.
Correct Wiring Sequence
Always connect LED → battery → solar panel in this exact order.
It protects the controller from reverse surge. Use waterproof connectors and keep junctions inside protective housings.
Common Wiring Mistakes to Avoid
Avoid reversed polarity, unsealed joints, and mismatched connectors.
These mistakes lead to controller burnout or moisture shorting. Always check continuity before powering on.
Field Troubleshooting Checklist (Project-Ready)
Use this checklist first to avoid trial-and-error repairs and reduce repeat site visits. For most commercial solar street lights, this sequence will identify the real fault faster than replacing parts one by one.
Tools You Need (Minimum)
- Multimeter (DC voltage + continuity)
- Insulation tape / waterproof gel / heat-shrink sleeves
- Spare waterproof connectors
- Basic hand tools (screwdriver set, wrench set)
Step 1 — Confirm the Symptom (Write it down)
- Completely OFF all night
- Turns ON briefly then OFF
- Very dim / uneven brightness
- Works after reset but fails again
- Charging seems OK but no lighting
Step 2 — Battery Test (Most common failure point)
- Measure battery voltage with light OFF
- Turn light ON and measure battery voltage under load
- If voltage collapses under load → battery weak or protection triggered
Battery issues are often linked to system sizing, voltage platform, or autonomy assumptions. For related design logic, see 3.2V low-voltage power architecture.
Step 3 — Controller Status & Settings (Most common “false failure”)
- Confirm system voltage (12V/24V) matches battery + panel
- Check lighting mode (timer / dusk-to-dawn / motion)
- Check dimming profile (over-aggressive dimming can look like a failure)
If your team is unsure whether the problem is hardware or settings, review how a solar street light controller actually manages charging and night-time lighting.
Step 4 — Panel Output at Midday (Root cause for “low battery”)
- Inspect shading, dirt, bird droppings
- Check connectors + junction box for corrosion
- Confirm stable voltage output at midday
Step 5 — Wiring & Waterproofing (Hidden killers)
- Verify polarity end-to-end (panel → controller → battery → LED)
- Re-seat loose terminals and re-seal waterproof joints
- Any green/white powder corrosion = rebuild that connection
🛠 Need help diagnosing repeated failures?
If several poles show the same fault — low battery, controller mismatch, or unstable lighting — our team can help review the system logic and suggest corrective actions.
👉 Request engineering support for your solar street light project
Solar LED Street Light Troubleshooting Guide
When a solar light fails, diagnosing the cause systematically prevents guesswork.
Start from the energy path (panel → controller → battery → LED). One weak link can stop the whole system.
Solar Panel Troubleshooting
Low or no voltage output? Check for shading, dirt, or broken wires first.
If readings are abnormally low at midday for your system design, clean the panel, inspect the junction box, re-check connectors, and confirm there is no partial shading during the main charging window.
Keep cable runs short where possible — long runs increase loss and add failure points.
If your team is comparing old and new system performance, the broader solar street lighting system guide can help identify component-level differences.
LED Light Troubleshooting
Dim or dead lights usually point to wiring, driver, or controller faults.
Confirm LED driver output and connector integrity. Replace damaged components and re-check controller parameters.
A controller reset can fix erratic behavior — try it before replacing hardware.
Battery Troubleshooting
Batteries fail quietly — low charge or protection shutdown are common signs.
Measure voltage at rest, then measure under load (light ON). If voltage looks normal at rest but collapses under load, the battery is often the real failure point.
If solar voltage is present but charging doesn’t occur, the controller or the charging path may be faulty.
For projects suffering from short runtime and repeated rainy-season failures, it is often worth checking whether the battery/panel balance and efficacy assumptions were correct in the first place. Related reading: 230 lm/W high-efficiency solar lighting.
Snippet Tip:
Q: Why is my solar street light not turning on?
A: Loose wiring, low battery voltage, controller error, or a failed LED driver are the main causes.
Maintenance of Solar LED Street Lights
Many repair problems are actually maintenance problems discovered too late. Good preventive checks reduce emergency failures and repeated call-outs.
Consistent cleaning and inspection extend lifespan and keep lights working smoothly.
A 10-minute quarterly check can save thousands in replacements.
Solar Panel Care
Keep panels clean and correctly oriented.
Dust or bird droppings can cut generation significantly. Wipe gently using a soft cloth; avoid abrasive cleaners.
Battery and Electrical Maintenance
Prevent corrosion and avoid long-term deep discharge.
Tighten terminals, apply anti-rust grease, and recharge idle units every 2–3 months. Replace batteries after 3–5 years depending on region temperature and usage profile.
Pole and Fixture Maintenance
Inspect for rust, cracks, or coating damage.
If paint peels, repaint promptly. Replace damaged poles — they’re safety hazards. Check lamp housings for leaks after storms.
Safety and Security Measures
Protect components from theft and fire hazards.
Mount panels securely, use tamper-proof bolts, and keep battery boxes locked. Train staff in safe handling of lithium batteries.
Snippet Tip:
Q: How to maintain solar LED street lights?
A: Clean panels, inspect wiring, test batteries under load, check waterproof sealing, and log quarterly maintenance reports.
Handover & Maintenance Log (Download Template)
Stop relying on memory during handover. A consistent checklist + measurement log helps EPC teams pass acceptance, diagnose failures faster, and reduce repeat site visits.
- Commissioning (Day 1): one row per unit (orientation, waterproofing, polarity, mode, lighting test)
- Measurements: panel voltage at midday, battery voltage (resting + under load), controller status
- Quarterly Maintenance: cleaning + corrosion + fastener + housing leak checks (with completion %)
- Repair Log: symptom → measured values → root cause → action → result (from open to close)
👉 Download the editable template (Excel): Solar Street Light Handover & Maintenance Log (.xlsx)
Recommended: save one copy per project and keep Unit ID / Pole No. consistent across tabs.
How to use (2 minutes)
- Fill Commissioning_Day1 during installation and keep it as the handover record.
- Record real voltages in Measurements (filter by Unit ID to see trends).
- Every quarter, complete Quarterly_Maintenance (Completion % highlights at-risk units).
- Track faults in Repair_Log and close tickets with Result + Date Closed.
Want help reviewing your maintenance records or repair logs?
If your project has repeated failures or unclear fault patterns, we can help review the system more systematically.
👉 Request a project troubleshooting review
Common Problems During Installation or Operation
Most recurring failures come from setup errors, mismatched components, or unchecked maintenance issues.
Use the list below as a fast scan before opening the controller or replacing parts.
- Light not responding: Check wiring polarity and controller output.
- Incorrect lighting time: Reset timing parameters.
- Controller mismatch: Confirm voltage and power ratings match.
- Battery draining too fast: Replace aged battery or clean dusty panels.
Small problems snowball quickly if ignored, so fix them early.
Conclusion – Ensuring Reliable Solar Street Light Performance
Correct diagnosis, proper installation, regular inspection, and timely repairs keep systems reliable and reduce total cost.
Most failed solar street lights can be repaired faster when teams follow the energy path logically instead of guessing. Systems with proper wiring, correct controller settings, and consistent maintenance perform noticeably better over time.
Keep records, train your team, and always double-check the basics — bright streets at night start with disciplined troubleshooting in the day.
Need Support for a Live Solar Street Light Project?
If your team is dealing with repeated failures, low battery runtime, controller setting confusion, or unclear wiring issues, we can help you review the project more systematically.
- 👉 Request Engineering Support
- 👉 Browse Solar Street Light Products
- 👉 Send Your BOQ or Project Details
FAQs About Solar LED Street Lights
How long does a solar LED street light last?
Most systems last 10–12 years when waterproofing, controller settings, and battery maintenance are done correctly.
What is the ideal tilt angle for solar panels?
Typically close to your latitude (often ±5° depending on seasonal goals), facing true south in the northern hemisphere.
How often should batteries be replaced?
Often every 3–5 years depending on climate, depth of discharge, and maintenance discipline.
What are the most common installation mistakes?
Wrong wiring order, loose bolts/terminals, and poor waterproof sealing.
Can solar street lights work in cold or cloudy weather?
Yes, but runtime may shorten unless panel sizing, battery capacity, and dimming profiles are designed for local conditions.
What should I check first when a solar street light is completely off?
Start with battery voltage under load, then check controller status, panel output at midday, and waterproof connectors. In many cases, the fault is not the LED lamp itself.
Can a solar street light battery look normal but still be faulty?
Yes. A battery may show acceptable voltage at rest but collapse under load when the light turns on. That is why load testing is more useful than resting voltage alone.
