
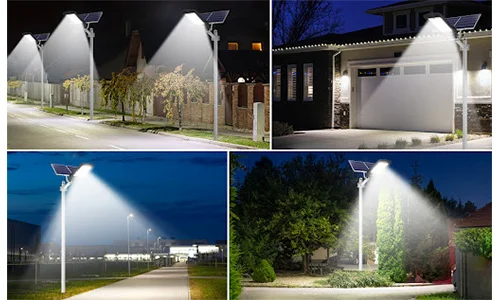
Installing a solar street light is not only about assembling a few components and raising a pole. In real use, installation quality directly affects charging performance, lighting reliability, safety, pole stability, and long-term maintenance.
A system that looks simple in a product photo can still perform poorly if the installation site, foundation, panel orientation, wiring, and fixture aiming are not handled correctly. That is why even a basic solar street light installation should be approached as a complete field task rather than a quick parts-assembly job.
For buyers, contractors, project teams, and users comparing self-installation with contractor installation, the real question is usually not only whether the light can be installed, but whether it can be installed safely and continue working reliably after rain, wind, dust, and day-to-day use.
If you are already comparing options for a live project, go directly to the next step:
Request Engineering Support → Request Engineering Support
View Lighting Solutions → View Lighting Solutions
Explore Product Options → Explore Product Options
See Project References → See Project References
Quick Answer
In many cases, a solar street light can be installed successfully with basic tools and a clear sequence:
- choose the right location
- prepare and check all components
- secure the pole and foundation properly
- mount the panel and fixture correctly
- connect battery, controller, and lamp carefully
- test the system before final handover
- plan basic cleaning and inspection after installation
However, installation should not be treated as “easy” just because the kit looks simple. In practical work, the most common failures come from poor siting, weak foundations, incorrect wiring, bad panel orientation, loose fasteners, or incomplete testing.
Why Installation Quality Matters More Than Many Buyers Expect
A solar street light does not fail only because of battery quality or rainy weather. In many cases, poor field performance starts with the installation itself.
Typical installation-related problems include:
- panels placed where part of the day is shaded
- poles fixed on weak or poorly cured foundations
- loose bolts that shift after wind exposure
- wiring that is connected incorrectly or not sealed properly
- lamp heads aimed too high or too low for the target area
This is why experienced installers and project reviewers do not treat installation as a minor last step. They review it as part of the system’s real operating performance.
What You Need Before Installation
Before work starts, it helps to confirm both the tools and the system components.
Basic Tools
Common installation tools may include:
- screwdrivers
- adjustable wrench or spanner
- drill where required
- ladder or lifting support
- safety gloves
- helmet
- measuring tape
- basic electrical test tool where applicable
Typical Solar Street Light Components
A standard system may include:
- solar panel
- LED lamp fixture
- rechargeable battery
- pole and mounting base
- controller
- brackets, bolts, and hardware
Before installation, all components should be laid out and checked against the packing list or supplied documentation. Missing bolts, damaged cables, or loose bracket joints are much easier to fix before pole raising than after installation.
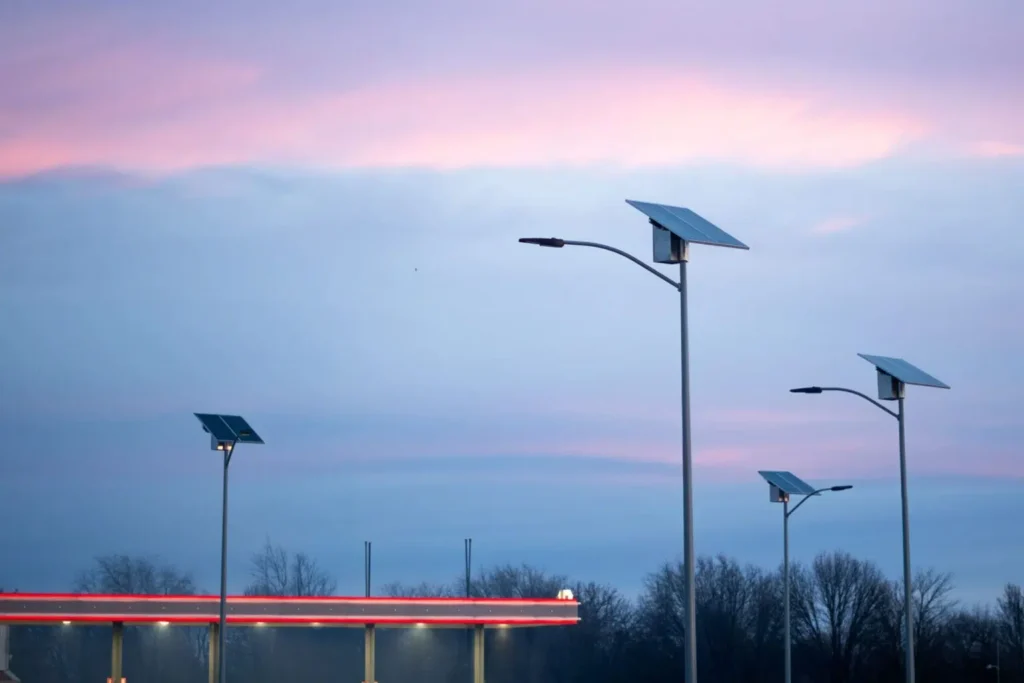
Step 1: Choose the Right Installation Location
Location is one of the most important parts of the installation.
The selected point should provide:
- strong daily solar exposure
- minimal shading from trees, buildings, tanks, or walls
- suitable lighting coverage for the target area
- enough clearance for foundation and safe pole placement
- no conflict with underground pipes, cables, or site obstacles where relevant
A site may look open at first glance but still perform badly if there is partial shade during key charging hours. This is one of the most common causes of weak charging performance after installation.
Practical Site Note
For practical installations, it is better to observe the site for panel shading risk, access constraints, and aiming direction before digging or fixing the pole base. Moving a pole after installation is far more costly than adjusting the location early.
Step 2: Prepare and Inspect the Components
Before lifting anything, lay all parts on the ground and confirm that the kit is complete.
Check that:
- the panel bracket is straight
- lamp housing and lens are intact
- cables and connectors are not damaged
- bolts, nuts, and washers are complete
- battery box or battery compartment is dry and secure
- controller and wiring labels can be identified clearly
At this stage, many systems are assembled partly on the ground before final mounting. This helps reduce mistakes at height and makes inspection easier.
Practical Installation Point
Do not rush bolt tightening. A loose connection may not look serious on day one, but vibration, wind, and repeated temperature change can quickly create movement, misalignment, or water-entry problems.
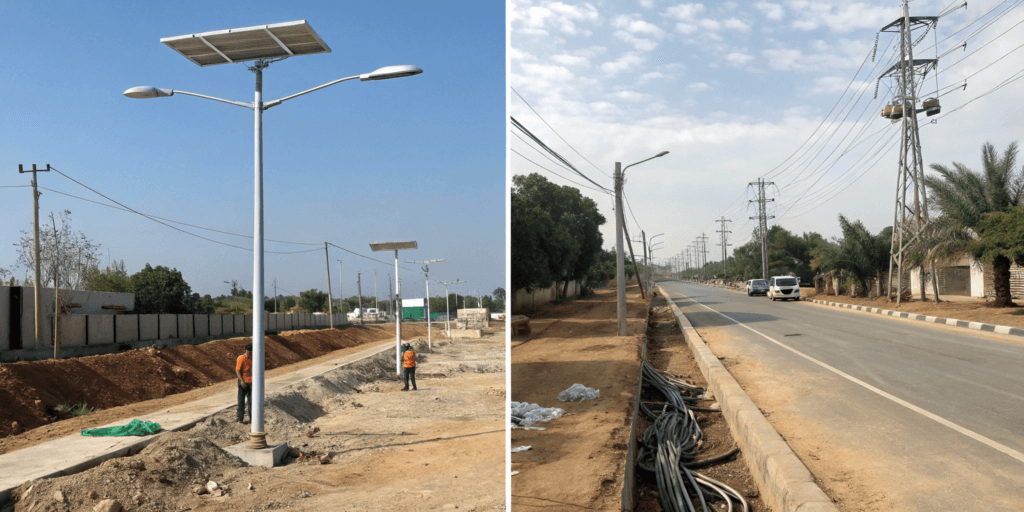
Step 3: Build a Stable Pole Base and Foundation
This is often the step that determines whether the installation lasts for years or starts failing in months.
The pole base should be stable enough for:
- pole weight
- bracket loading
- wind exposure
- soil condition
- long-term ground stability
In many small installations, manufacturers may provide a basic foundation recommendation. But these values should not be copied blindly. Soil softness, drainage condition, local wind exposure, and pole height can all change what is actually required.
Practical Foundation Note
A foundation detail that works in compact, stable ground may not be enough in soft, wet, sandy, or erosion-prone soil. Where the site condition is poor, deeper or better-reinforced support may be necessary.
Safety Point
If the pole is heavy or tall, do not try to raise it alone. Use enough manpower, lifting support, and safe handling practice. Many installation accidents happen not during operation, but during lifting and positioning.
Step 4: Mount the Solar Panel and Lamp Correctly
Once the base is stable, the solar panel and lamp fixture can be mounted.
At this stage, attention should be given to:
- panel orientation toward useful solar exposure
- tilt suited to site and latitude conditions
- fixture direction toward the real target area
- bracket tightening and alignment
- clearance from nearby objects or shading sources
A lamp aimed too high may waste light. A panel aimed poorly may reduce charging performance. Even when the product itself is good, incorrect mounting geometry can reduce real-world performance significantly.
Practical Mounting Point
Panel tilt and direction should be treated as site decisions, not copied automatically from another project. The correct angle depends on local solar conditions, seasonal exposure, and the physical layout of the site.
Step 5: Connect the Battery, Controller, and Lamp Carefully
The wiring stage must be handled with more care than many first-time installers expect.
The exact connection order depends on the product design, but in general, installers should confirm:
- cable labels and polarity
- correct connector matching
- battery protection during handling
- dry, sealed connection points
- no forced cable bends or exposed vulnerable joints
If the system uses plug-and-play connectors, installation may be easier, but checking is still important. A wrong polarity connection or poorly sealed joint can lead to early failure even if the light appears to work during the first test.
Safety Point
Batteries should be handled carefully during installation. Avoid short-circuit risk, direct water exposure, impact damage, or forcing incompatible connectors.
Step 6: Run the First System Test
Before the job is considered complete, the light should be tested in practical conditions.
Typical checks include:
- whether the lamp turns on under night simulation or reduced panel input
- whether sensors, if included, work as intended
- whether the fixture covers the actual target area
- whether the panel and lamp remain firmly fixed
- whether the battery and controller respond normally
A quick switch-on test is not enough by itself. The system should be checked for correct function, stable mounting, and realistic coverage.
Need Help Reviewing Installation Logic?
If you are comparing installation methods for a road, compound, clinic, school, pathway, or public-lighting project, it is usually better to review the system together with site conditions, foundation logic, and layout needs rather than by product appearance alone.
Request Engineering Support → Request Engineering Support
View Lighting Solutions → View Lighting Solutions
See Project References → See Project References
Common Installation Mistakes
The most common field mistakes usually include:
- choosing a location with partial shade
- underestimating soil weakness or drainage risk
- leaving bolts or brackets insufficiently tightened
- using poor cable routing or weak sealing
- aiming the lamp incorrectly
- skipping a proper final test
In practical review, many installation problems do not come from the product itself. They begin when a site is chosen too quickly, the foundation is treated as a minor step, or the installer assumes that all kit components can simply be assembled without checking the real environment.
A solar street light installation that looks complete on day one can still perform badly if the panel receives poor sun, the base shifts slightly, or the fixture is aimed badly. That is why site judgment and final checks matter as much as the hardware.
What Basic Design Rules Still Matter?
Even for relatively simple installations, a few engineering principles still matter.
1. Sun Exposure and Shading
The panel should receive as much clear daylight as possible. Repeated shading from nearby objects can reduce charging performance and battery recovery.
2. Pole Stability
Pole support should be matched to site condition, pole size, and local exposure. Weak pole support creates both safety and reliability risk.
3. Aiming and Coverage
The lamp should light the real target zone rather than spill light upward or away from the useful area.
4. Waterproofing and Connection Protection
Connection points and battery-related components should be protected from water ingress, dust, and avoidable mechanical damage.
5. Final Functional Testing
Installation is not complete until the system has been checked for charging logic, switching behavior, fixture direction, and stable physical mounting.
What Standards or Technical Frameworks Are Relevant?
Even when the installation is small, some recognized frameworks still help buyers and project teams think more clearly about reliability and compliance.
Depending on the project, relevant references may include:
- IEC 60598, where luminaire safety requirements are relevant
- IEC 60529, where IP protection claims should be understood in a recognized framework
- IEC 62262, where IK impact protection may matter in exposed public environments
- ISO 1461, where galvanized steel poles or brackets are part of the durability discussion
- UN 38.3, where lithium battery transport documentation may matter for logistics and project supply
These references do not replace project-specific design or installation supervision, but they help buyers judge whether the system is being presented in a more professional and verifiable way.
Practical buyer note
If a supplier says the product is easy to install, it is reasonable to ask:
- what site conditions that statement assumes
- whether foundation guidance is included
- whether panel direction and tilt guidance is supplied
- whether battery and controller wiring is clearly documented
- whether similar project references are available
Want a More Project-Ready Installation Plan?
If the installation is part of an active project, it is usually safer to review the site, layout, mounting method, and support documents before work begins.
Request Engineering Support → Request Engineering Support
View Lighting Solutions → View Lighting Solutions
Explore Product Options → Explore Product Options
Basic Maintenance After Installation
A solar street light should not be ignored once it turns on successfully. Basic maintenance helps protect long-term performance.
Typical checks may include:
- cleaning dust, dirt, or bird droppings from the panel
- checking bolts and mounting points after storms or vibration
- inspecting exposed cables and seals
- checking whether output or runtime has declined abnormally
- replacing battery components when performance drops beyond acceptable levels
A few minutes of inspection at regular intervals can help prevent a small problem from turning into a full system failure.
Related Project Perspective
In real project work, installation should be reviewed together with:
- site exposure
- foundation condition
- corrosion environment where relevant
- maintenance access
- pole structure
- lighting target
- approval or consultant expectations
If you want to see how solar lighting systems are applied in actual project contexts, you can review our Projects page.
You can also move to the next step here:
See Project References → See Project References
Request Engineering Support → Request Engineering Support
View Lighting Solutions → View Lighting Solutions
Explore Product Options → Explore Product Options
Buyer Checklist Before Installation
Before approving or starting a solar street light installation, it is worth checking:
- site sun exposure
- shading risk
- soil and foundation condition
- pole size and stability
- panel direction and tilt
- fixture aiming
- wiring sequence and polarity
- waterproofing and sealing
- final test procedure
- available installation guidance and project support
A solar street light installation should not be judged only by whether the lamp turns on once. It should be judged by whether the system is safely installed and likely to operate reliably over time.
FAQ
Is it easy to install a solar street light by yourself?
In many cases, a solar street light can be installed with basic tools and clear instructions. However, the difficulty depends on pole size, site condition, foundation method, wiring design, and whether lifting can be done safely.
What is the most important part of solar street light installation?
Site selection and foundation quality are among the most important parts. Poor shading conditions or weak pole support can undermine an otherwise good product.
Do solar street lights need concrete foundations?
Some do, especially where pole height, wind exposure, or soil condition requires stronger support. The right foundation depends on the installation environment and product design.
What angle should a solar panel be installed at?
There is no single angle for every site. Panel tilt should be matched to local latitude, solar exposure, seasonal conditions, and physical layout.
What usually causes installation failure?
Common causes include shade, weak foundations, poor wiring, bad sealing, loose bolts, and incorrect lamp aiming.
How should the system be tested after installation?
The system should be checked for switching behavior, mounting stability, coverage, sensor response where applicable, and overall function under realistic conditions.
Summary
Installing a solar street light is not only a matter of connecting parts. Reliable performance depends on how the site, foundation, mounting, wiring, aiming, and final testing are handled together.
The best installation result comes from checking:
- location and sunlight
- pole base stability
- panel and fixture alignment
- wiring and sealing
- practical test results
- maintenance readiness
If you are reviewing a solar street light installation for a clinic, school, road, compound, pathway, or public-lighting project, it is usually better to compare installation options together with site conditions and engineering support rather than assuming every kit installs the same way.
Next Step
If you are working on a road, compound, school, clinic, contractor project, or public-lighting installation, the safest next move is to compare the site condition, mounting method, and support documents before installation begins.
Request Engineering Support → Request Engineering Support
View Lighting Solutions → View Lighting Solutions
Explore Product Options → Explore Product Options
See Project References → See Project References
