Solar street lights with poles offer faster installation, unified warranties, and predictable structural fit, making them ideal for large-scale rollouts and high-wind or coastal environments. Lights without poles reduce freight and customs costs—but shift mechanical and corrosion risks to the EPC, requiring tight control over spigot size, bolt circle, and galvanizing QA. Choose “with pole” when speed and accountability matter; choose “without pole” only if your local pole supply chain is proven and well-documented.
If you're aiming for faster installs, fewer headaches on-site, and predictable structural outcomes, going with pole makes a lot of sense.
But if your priority is shipping savings and you're confident in local fabrication quality, then without pole may give you the edge—assuming you lock down all interface details from day one.
Why the Pole Decision Impacts Your Schedule and TCO
The pole isn’t just a vertical steel pipe—it’s the dimensional backbone of your system.
Once you commit to a pole strategy, you’re also deciding:
- Who handles the interface risk (spigot fit, bolt circle, outreach angle)
- How fast your crews can replicate installs
- Whether the project will pass inspection without surprises
After enough time in the field, you learn: the pole spec is a throttle for site risk. Get it right, and productivity hums. Get it wrong, and your install teams become troubleshooters.
What’s Included in a “With Pole” Package—and Why It Matters
When you choose a “with pole” package, you’re basically asking one supplier to own the full mechanical interface: pole, bracket, lamp, templates, and mounting bolts.
That brings tighter fit-up and unified warranty control.
Typical inclusions:
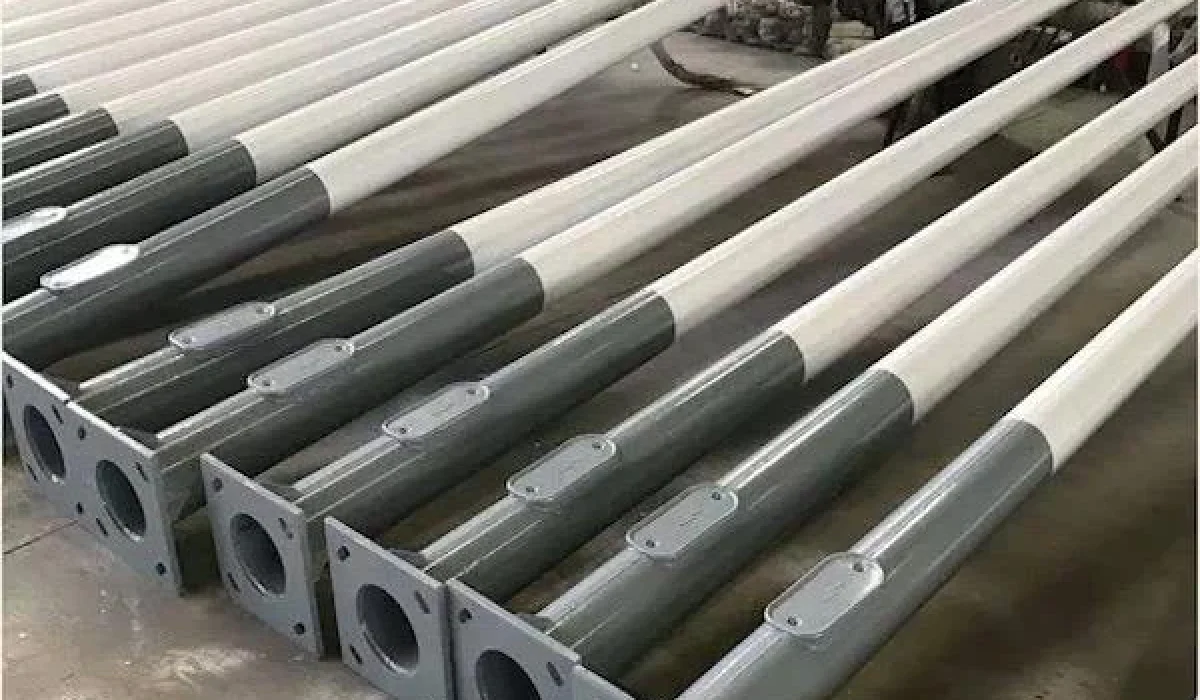
- Hot-dip galvanized pole (tapered/octagonal) with base plate, anchor cage, hand-hole
- Arm/bracket with defined outreach and tilt
- Luminaire (integrated or split), LiFePO₄ battery, MPPT controller
- Mounting hardware, GA drawings, anchor templates
- Optional: marine-grade coating, anti-vandal fasteners, SPD, or monitoring module
Why this matters:
- Spigot diameter, arm insertion depth, and tilt are all pre-matched
- Foundations, poles, and luminaires follow one revision-controlled drawing
- Crews can repeat one installation detail—less fiddling, fewer punch-list items
When “With Pole” is the Right Call
Choose a full “with pole” solution when:
- You have tight rollout schedules
- The site is remote, coastal, or has limited revisit capacity
- Your QA team can’t micromanage flange squareness or galvanizing quality
- You want one vendor to cover structural and electrical warranty
It may cost more up front, but your install curve stays smooth.
When “Without Pole” Can Work Well
Going “without pole” is tempting when:
- You’ve got a trusted local pole manufacturer
- Municipal standards dictate pole height or flange specs
- Import duties or demurrage make long items expensive
- You’re retrofitting existing poles with set dimensions
But remember: now the EPC owns the fit-up risk.
That means you’ll want to lock down drawings and galvanizing quality control early—ideally before the first container ships.
Hidden Risks of “Without Pole” (And What to Watch For)
There are a few technical traps that tend to show up on “lamp-only” jobs:
- Spigot fit is off by 2–3mm
- Outreach or tilt deviates slightly—enough to mess up your beam throw
- Base-plate bolt holes are rotated wrong
- Galvanizing is patchy or missing vent holes
- Weld seams don’t align, or shaft has a visible bow
To catch these:
- Run a first-article fit-up before mass production
- Freeze tolerances: spigot dia (48/60/76 mm), insert depth, clamp method
- Confirm base-plate bolt circle, slot sizes, and orientation with early templates
- Validate flange squareness and welds with basic jigs
- Specify target zinc thickness and post-dip cleanup requirements
Cost & Risk Comparison
| Cost Component | With Pole | Without Pole | Risk Owner | Notes |
|---|---|---|---|---|
| Equipment (ex-works) | Higher bundled price | Lower lamp-only price | Shared | Integration buys warranty clarity |
| Freight/Customs | Higher (pole volume) | Lower (local pole) | EPC | Poles drive CBM and demurrage |
| QA/Inspection | Centralized | Multi-vendor | EPC | Coordination hours go up |
| Foundation Templates | Matched by vendor | EPC aligns cages | EPC | Misalignment = costly rework |
| Installation Labor | Faster, repeatable | Slower, due to tweaks | EPC | Labor costs stack on long corridors |
| Warranty Handling | One contact point | Split among vendors | EPC | Delays in claims |
| TCO Predictability | High | Variable | EPC | Depends on QA + drawings discipline |
Interface Points That Must Match
There’s no shortcut here: if you mismatch any of the following, the site will tell you quickly.
- Mounting height (influences lux uniformity)
- Outreach + tilt (adjusts beam throw, sidewalk spill)
- Spigot fit (diameter, depth, clamp type)
- Base-plate bolt pattern (circle diameter, slot orientation)
- Wind-load spec (local terrain, gusts, top load area)
- Galvanizing method (zinc thickness, drain holes)
- Hand-hole access (wiring room, gland location)
- Earthing & SPD alignment
- Optics (IES/LDT, lens type)
- Battery protection + BMS lifecycle
- IP/IK rating (for street-level durability)
Wind Load vs. Pole Height
Here’s a quick reality: the panel is the sail.
Set your mounting height based on lighting targets (lux/uniformity), but check:
- Total top load: mass + projected area
- Terrain category
- Gust factor and local wind zone
- Section modulus and deflection limit of the pole
- Footing/anchor cage sizing
Skipping this step is how you end up with loose bolts or fatigue failures after the first storm.
Do Optics Change Between “With Pole” and “Without”?
The photometrics don’t care who made the pole—but outreach, tilt, and mounting height absolutely do.
Common issues when using third-party poles:
- Beam throw undershoots target area
- Excessive tilt = pedestrian glare
- Tilt not locked in → moves over time
Solution: lock one detail and replicate. Then validate it using IES or LDT plus a layout screenshot.
Tender Docs You Should Always Require
A good tender protects your site teams before they even pour concrete.
Minimum inclusions:
- GA drawings: pole, arm, base-plate, anchor cage
- BOM with scope split (who supplies what)
- Photometrics: IES or LDT plus layout
- Structural calculations (wind zone, terrain)
- Galvanizing certificate (with target zinc thickness)
- Material + welding certs
- IP/IK test reports
- Battery & BMS specs
- Warranty matrix (split by component)
- Installation method statement + QA checkpoints
Installation Timeline Differences
With Pole Workflow:
- Approve GA → cast foundation via template → drop poles → wire → test
Outcome: crews hit targets, fewer adjustments on-site.
Without Pole Workflow:
- Qualify fabricator → inspect welds/zinc → fit-up in yard → issue templates → cast foundation → adjust in field
Outcome: more moving parts, more oversight needed.
Decision Matrix
| Scenario | Constraint Level | Recommendation | Reason |
|---|---|---|---|
| Rural corridors + small QA team | High | With Pole | Faster, fewer adjustments |
| Coastal / marine environment | High | With Pole | Corrosion + wind control |
| City retrofit w/ legacy poles | High | Without Pole | Must match bolt patterns |
| Customs penalizes long items | Medium–High | Without Pole | Lower CBM, duty savings |
| New township, fixed timeline | High | With Pole | Schedule trumps savings |
| Proven local fabricator exists | Low–Medium | Without Pole | If QA is tight, it works |
QA Checklist for Lamp-Only Projects
- Fit-up one full set in yard
- Confirm bolt circle with anchor mock-up
- Measure zinc coating, check for thread masking
- Flange squareness: use a basic gauge
- Shaft straightness: string-line or laser
- Clamp torque test: check for tilt drift over 24h
- Document w/ photos and freeze this as the approval sample
Procurement Clause Suggestions
- Milestone payment tied to GA/template approval
- First-article fit-up required before production
- Layout validation based on lux at defined spacing
- Warranty split by component, named responsible party
- Spare clamps/bolts per 50 sets to reduce micro-delays
- SLA on support/replacement timelines
How Sunlurio Handles Both Paths
We offer both:
With Pole:
Full GA drawing pack, pre-matched interfaces, wind zone structurals, torque specs
Without Pole:
Interface kit (arm + spigot), drawing pre-checks, and one-set mock-up for yard approval
In both cases, the principle stays the same: prove it once, then scale it.
Common EPC Questions
| Question | Answer |
|---|---|
| Does “with pole” drive up shipping? | Yes, but often pays off in site speed |
| Can I use my own poles? | Yes, just lock down spigot and bolt patterns |
| Does all-in-one reduce pole needs? | Not really—panel area is still the wind driver |
| How does warranty work without pole? | Usually split: structure vs electronics |
| How to keep lighting consistent? | Match height/outreach/tilt and validate layout |
Step-by-Step Method to Choose
- Define lighting targets: lux + uniformity
- Pick mounting height and spacing via simulation
- Lock interfaces: spigot, clamp, bolt circle, tilt
- Confirm structural + foundation design
- Choose your supply strategy:
- High risk or tight timeline → With Pole
- Local advantage + strong QA → Without Pole
- Run cost comparison including install speed + risk
- Do a first-article yard build
- Standardize rollout: checklists, photos, torque logs
Tender Checklist (Use in Specs)
- [ ] Lighting class + uniformity defined
- [ ] Mounting height + tilt fixed
- [ ] Spigot dia/insertion/clamp type locked
- [ ] Base-plate + bolt circle toleranced
- [ ] Anchor template issued early
- [ ] Wind-load design docs attached
- [ ] Galvanizing specs and certs listed
- [ ] IP/IK test reports included
- [ ] LiFePO₄ and BMS protections stated
- [ ] MPPT + dimming schedules defined
- [ ] Photometry files attached
- [ ] Warranty split clearly listed
- [ ] Yard fit-up scheduled before mass production
- [ ] Spare parts allocation included
Final Thoughts
If you're after schedule control, clean warranties, and no excuses on-site, go with pole.
If you’ve got a tight freight budget and a rock-solid local pole shop, without pole can win—as long as your QA is strict and your interfaces are frozen.
Either way, don’t let the BOQ fool you. The real cost shows up during rollout.


