 Skip to content

Assembling a solar street light may seem complicated at first, but it's a simple process when broken down step by step. This guide will help you set up your solar street light properly, ensuring you get the most out of its efficiency and durability.
The key to successful solar street light installation is understanding each step—from mounting the pole to connecting the battery. This guide will walk you through everything you need to do, ensuring your light runs smoothly and effectively for years.
Let’s dive into the process and explore how to assemble your solar street light from start to finish.
1. Preparation
Before you begin, make sure you have all the necessary tools and equipment. Missing or incorrect components can delay your installation. Here’s what you’ll need:
- Solar street light pole
- Solar panel
- LED light fixture
- Battery pack
- Controller
- Basic tools (wrench, screwdriver, bolts, etc.)
- Waterproof connectors
Tip: Double-check the condition of all the components before starting. This will save you time and avoid unnecessary frustration during the assembly.
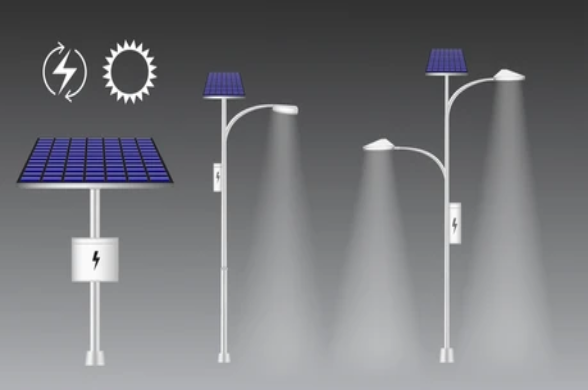
2. Install the Pole
The first step is installing the pole. This is where the light will be mounted, so it's important to choose a location that gets maximum sunlight for the solar panel. Here's how to do it:
- Step 1: Pick a location that isn’t shaded by trees or buildings. A sunny spot is crucial for solar efficiency.
- Step 2: Dig a hole for the pole’s base. It should be deep and wide enough to secure the pole firmly.
- Step 3: Set the pole in the hole and fill it with concrete, if needed, to ensure it stands tall and stable.
Tip: Make sure the pole is perfectly vertical when setting it. If the pole isn’t level, it could affect the alignment of the solar panel.
3. Mount the Solar Panel
Once the pole is secure, the next step is mounting the solar panel. The panel needs to be placed in a way that gets as much sunlight as possible throughout the day.
- Step 1: Attach the mounting brackets to the solar panel.
- Step 2: Secure the solar panel to the top of the pole, ensuring it’s positioned at the right angle for maximum sun exposure (typically 15-45 degrees depending on your location).
- Step 3: Tighten all the bolts to hold the panel in place securely.
Tip: Adjust the angle of the panel throughout the year to follow the sun’s movement for the best results.
4. Install the LED Light Fixture
Now that the solar panel is in place, it’s time to mount the LED light fixture. This step is straightforward but crucial for providing proper illumination.
- Step 1: Attach the LED light fixture to the pole or the designated mounting area.
- Step 2: Make sure the light is angled to cover the area you want illuminated. The fixture should be at a height that maximizes its coverage area.
- Step 3: Secure the light in place with screws or bolts.
Tip: Check that the LED light is rated for outdoor use to ensure it can withstand the elements.
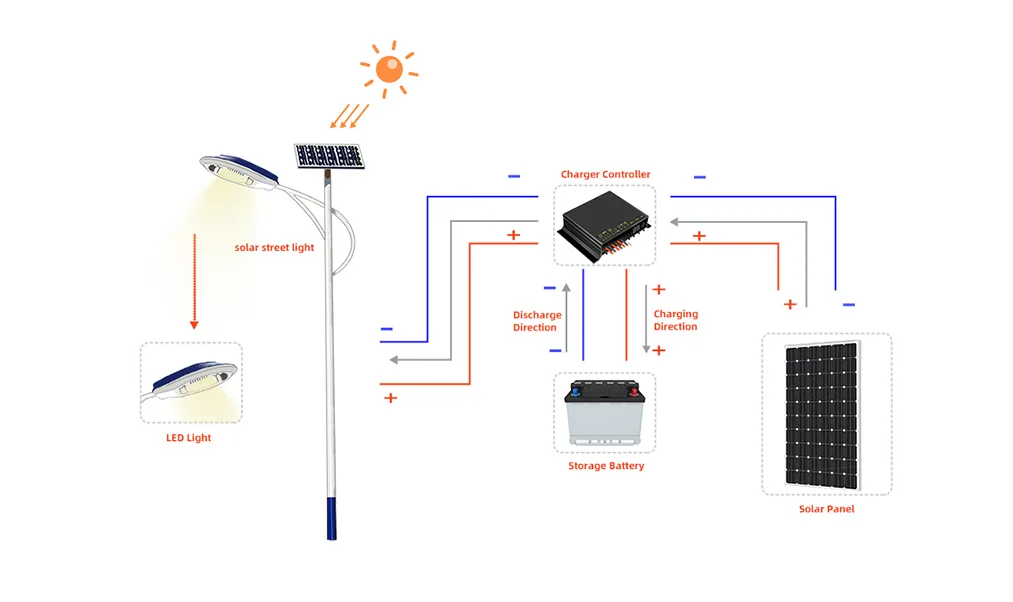
5. Connect the Battery Pack
The battery pack stores energy collected from the solar panel during the day to power the LED light at night. Properly connecting the battery is critical to ensure your system works as intended.
- Step 1: Connect the battery to the solar panel’s output terminals.
- Step 2: Link the battery to the LED light, making sure the wiring is safe and secure.
- Step 3: Ensure all connections are properly insulated to avoid short circuits.
Tip: Choose a battery pack with enough capacity for your area’s lighting needs. It’s better to have slightly more capacity than too little.

6. Install the Controller
The controller manages the flow of energy between the solar panel, battery, and LED light. It ensures the light turns on automatically when the sun sets and charges the battery during the day.
- Step 1: Mount the controller in a dry, safe location on the pole, usually near the battery.
- Step 2: Connect the solar panel, battery, and LED light to the controller, following the wiring instructions carefully.
- Step 3: Test the system by simulating day and night conditions to check if the light operates as expected.
Tip: Some controllers offer features like dimming or adjustable settings. Make sure you configure it to suit your lighting needs.
7. Final Testing
After assembling everything, it’s important to do a final check to ensure the solar street light is working correctly.
- Step 1: Make sure the solar panel is exposed to sunlight and is charging properly.
- Step 2: Check that the battery is fully charged and the LED light turns on at dusk.
- Step 3: Test the light’s brightness and coverage area to make sure it’s sufficient for the intended location.
Tip: Allow the system to charge for a full day to ensure optimal performance, especially if it’s your first time testing the setup.
Conclusion
Assembling a solar street light is easier than it seems if you follow the right steps. By properly mounting the pole, positioning the solar panel, installing the LED light, and connecting the battery and controller, you can enjoy a reliable and energy-efficient lighting solution for years to come. Take your time, ensure everything is securely fastened, and always test the system to confirm it’s working as expected. With proper assembly and maintenance, your solar street light will provide excellent illumination while helping you save on energy costs.

