

Struggling with your first light pole installation project? You’re not alone – even experienced contractors sometimes lose days on site because of small details that went wrong.
Proper light pole installation ensures safety, longevity and smooth handover. It prevents costly rework, meets regulations, and protects your reputation with clients and municipalities.
As a manufacturer supplying steel and hot-dip galvanized light poles for road, solar and industrial projects in Africa and the Middle East, I’ve seen the same problems repeat: wrong pole choice, weak foundations, misaligned anchor bolts and poor grounding.
This guide is written for new contractors, small EPCs and sub-contractors who want their first few projects to go right – and to avoid learning everything the hard way.
Light Pole Basics for New Contractors
Light poles may look simple, but choosing the wrong type or missing key components can derail an entire project or delay inspection.
Different projects require different pole materials, coatings and mounting types. Understanding these basics helps you read drawings correctly and order the right products.
Where Light Poles Are Commonly Used
- Public roads and highways
- Residential streets and estates
- Parking lots and commercial plazas
- Sports fields, parks and campuses
- Ports, industrial yards and factories
In many projects, poles don’t just carry lights – they also support CCTV, signage, small antennas or solar fixtures. That adds extra weight and wind load you must consider.
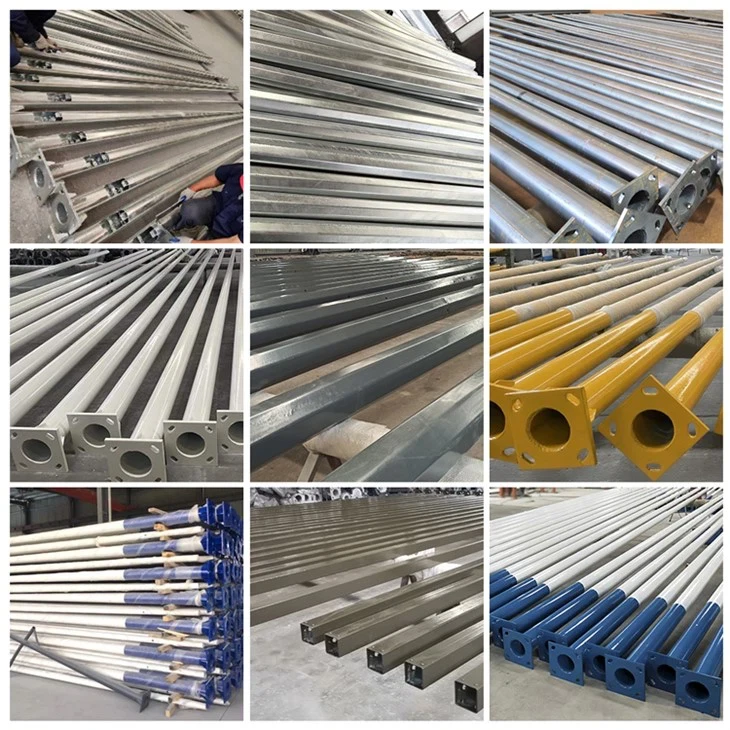
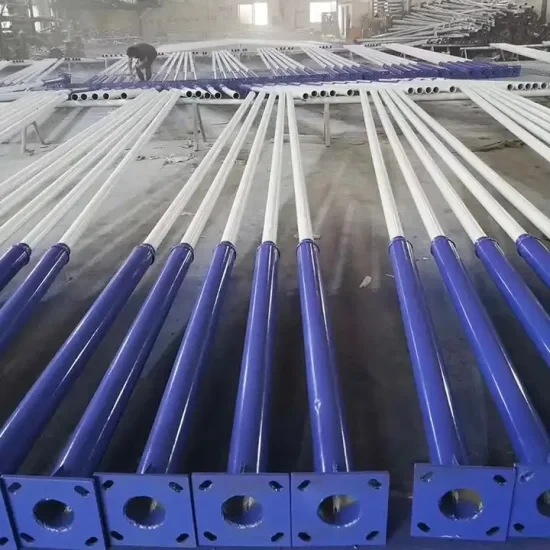
Common Types of Light Poles
| Pole Type | Typical Applications | Key Advantages | Main Limitations |
|---|---|---|---|
| Steel | Roads, highways, industrial yards | Strong, cost-effective, many sizes | Needs proper galvanizing to avoid rust |
| Aluminum | Coastal roads, seafront promenades | Excellent corrosion resistance, lightweight | Higher material cost |
| Fiberglass | Parks, decorative areas, near substations | Non-conductive, lightweight, low maintenance | Lower structural capacity |
| Concrete | Industrial, high-vandalism areas | Very robust, long life | Heavy, slow to install/change |
| Wood | Rural, temporary or low-budget projects | Cheap and easy to source locally | Shorter life, not for main roads |
For most B2B road and industrial projects, hot-dip galvanized steel poles are still the workhorse – especially when you balance cost, strength and availability.
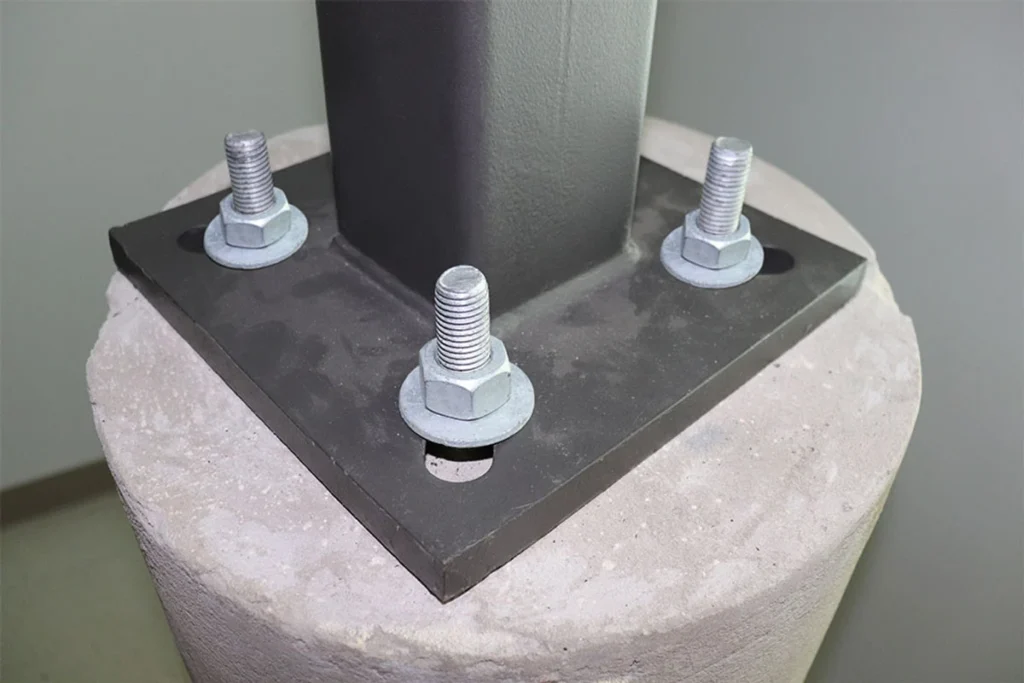
Key Light Pole Components
| Component | What It Does |
|---|---|
| Base plate | Flat plate at the bottom that sits on the foundation |
| Anchor bolts | Threaded rods cast into concrete to hold the pole |
| Pole shaft | Tapered or straight section that carries the load |
| Arm / bracket | Extends the luminaire out from the pole |
| Luminaire | The LED light fixture itself |
| Handhole | Opening near base for cable connections and maintenance |
💡 Contractor Tip – Fabrication Quality Affects Your Labor Cost
Most on-site headaches come from base plates that don’t sit flat, bolt holes that don’t match the template, or poles that aren’t straight.
A good manufacturer will:
- Weld and machine base plates with proper jigs
- Drill bolt holes to match a standard template
- Check pole straightness before galvanizing
When you request quotes, ask how the supplier controls these points – it can save you hours of crane time on each pole.
Pre-Installation Planning for Light Pole Projects

You can’t just show up with a crew and start digging. Good planning avoids expensive surprises, change orders and rework.
Before installing any light pole, assess the site, confirm structural and electrical requirements, and make sure the pole design matches local conditions.
Site Assessment Before Light Pole Installation
Check the basics on every site:
| Item | What to Check |
|---|---|
| Soil conditions | Soft, sandy, rocky, clay or backfilled ground |
| Underground utilities | Power, water, fiber, gas – request markings before digging |
| Wind exposure | Open/coastal vs sheltered – affects wind load requirements |
| Traffic and access | Crane access, road closures, safety barriers |
On one project in East Africa, we avoided a serious problem by discovering a buried fiber-optic line during the survey. One phone call saved days of delay and a very unhappy client.
Permits and Standards to Consider
Depending on country and city, you may need to comply with:
- Height and setback limits near roads and properties
- Traffic safety regulations if working in live carriageways
- electrical codes for cabling, grounding and protection
- structural standards for poles and foundations
- Stamped drawings from a licensed engineer for municipal work
Clarify these with the client or consultant before you order poles or foundations.
Choosing the Right Light Pole for Your Project
Match the pole spec to the actual job instead of picking the cheapest option on the list.
| Factor | Why It Matters | What to Discuss with Supplier |
|---|---|---|
| Pole height | Affects light spread, glare and required footing | Application (road, yard, sport, port) |
| Load rating | Must carry luminaires, arms, cameras, signs | Number/size of fittings per pole |
| Coating / finish | Determines corrosion resistance | Inland vs coastal, pollution level |
| Mounting type | Anchor base vs direct-burial | Replacement strategy and foundation design |
For busy roads, logistics yards and industrial estates, I usually recommend hot-dip galvanized anchor-base poles: they’re strong, durable and easier to replace if a vehicle hits them.
💡 Contractor Tip – Don’t Fight with Misaligned Anchor Bolts
Misaligned anchor bolts and base plates are one of the biggest causes of on-site delays. A few millimetres off in the foundation can mean hours of grinding, slotting or re-drilling.
When you order poles, ask the manufacturer to:
- Supply steel bolt templates for foundations
- Confirm base plate hole pattern drawings
- Pre-fit sample poles and bases in the factory for major projects
Tools and Equipment Required for Light Pole Installation
Forgetting one key tool can stall your project for half a day while the crane sits idle.
Use a simple tools and materials checklist before mobilising to site, so your team can work safely and efficiently from day one.
Light Pole Installation Tools Checklist
| Tool / Equipment | Purpose |
|---|---|
| Excavator or auger | Digging foundation holes |
| Crane or boom lift | Lifting and positioning poles |
| Spirit level | Checking vertical alignment |
| Plumb line | Verifying straightness over full height |
| Torque wrench | Tightening nuts to specified torque |
| Hand tools | Spanners, sockets, screwdrivers, pliers |
| PPE | Helmets, gloves, boots, harnesses, vests |
| Laser level (opt.) | Checking foundation and pole elevations |
Materials Needed to Install a Light Pole
| Material | Function |
|---|---|
| Anchor bolt kit | Secures pole to concrete foundation |
| Bolt template plate | Positions bolts accurately before pouring |
| Concrete & rebar | Forms the structural foundation |
| Conduit & pull wire | Protects and guides power/data cables |
| Ground rod & clamp | Provides safe fault path to earth |
| Junction boxes | Houses cable joints and protection devices |
| Sealants & tape | Waterproofs handholes, joints and terminations |
A simple but important trick: wrap anchor bolt threads in tape before pouring concrete. It keeps the threads clean and makes installation much easier.
📥 Download: Light Pole Installation Checklist (PDF) "Download: Light Pole Installation Checklist (PDF)")
We’ve turned the tools and materials in this guide into a one-page job-site checklist your crew can use for each foundation and pole.
👉 Get the printable installation checklist for your next project
Step-by-Step Light Pole Installation Guide
Installation is more than “dig hole, pour concrete, stand pole”. Every step affects safety, alignment and long-term performance.
Follow a structured process: prepare a solid foundation, align the pole correctly, complete wiring carefully and test everything before handover.
Foundation Preparation for Light Poles
- Mark the exact location based on drawings or survey points.
- Excavate the foundation hole to the specified depth and width.
- Install the rebar cage according to structural drawings.
- Fix the anchor bolt template so bolt spacing matches the base plate.
- Align and plumb the bolts, checking height and orientation.
- Pour concrete and vibrate to remove air pockets.
- Allow the concrete to cure for the specified time before loading.
In soft or sandy soils, foundations may need to be deeper or wider. Never “guess” foundation size – follow the engineer’s design.
Setting and Aligning the Light Pole
- Attach lifting slings at the recommended lifting points.
- Use a crane or boom lift to raise the pole into position.
- Lower the pole onto the anchor bolts carefully.
- Install washers and nuts and tighten them gradually in a cross pattern.
- Check verticality using a level on at least two faces.
- Adjust with leveling nuts or shims until the pole is perfectly plumb.
- Tighten all nuts to the specified torque.
Misalignment shows up immediately at night: poles that lean forward or sideways create glare, uneven light and a visually “crooked” street.
Wiring and Electrical Connections
- Pull cables through conduits to the pole handhole.
- Connect the luminaire(s) following the wiring diagram.
- Install proper grounding, bonding the pole and system to a ground rod.
- Secure all joints with suitable connectors and insulation.
- Seal handholes and junction boxes to keep water and dust out.
- Label circuits and poles for easy future maintenance.
Most failed inspections come from grounding issues, loose connections or wrong protection devices – take your time here.
Final Inspection and Testing
Before handover:
- Test lights at night or in low light.
- Re-check base plate, nuts and washers for movement or gaps.
- Confirm grounding resistance according to code.
- Document torque values, test readings and photos.
A simple inspection sheet attached to your handover package shows your client you take quality seriously.
Light Pole Safety Tips for New Contractors
Safety is not an extra step – it’s part of doing the job properly.
Follow your client’s HSE rules and international best practices to protect workers, equipment and the public.
Basic Safety Practices
- Provide and enforce the use of PPE (helmets, gloves, boots, high-vis vests).
- Use fall protection when working at height on lifts or platforms.
- Set up barriers and warning signs around the work zone.
- Follow lockout/tagout procedures when working on electrical systems.
- Keep first aid kits and fire extinguishers close to the working area.
Common Hazards and How to Avoid Them
| Hazard | Prevention Tip |
|---|---|
| Pole tipping | Use proper rigging and temporary bracing |
| Bolt misalignment | Use accurate templates and double-check before pouring |
| Electrical shock | Test circuits, use proper grounding and protection |
| Trip hazards | Mark or cover trenches and exposed conduits |
| Falling objects | Exclude non-essential people from lifting area |
Light Pole Maintenance and Troubleshooting
Even a perfectly installed pole will need inspection over time.
Regular maintenance prevents small issues – like corrosion or loose hardware – from becoming safety problems or emergency call-outs.
Typical Light Pole Maintenance Schedule
| Frequency | Recommended Task |
|---|---|
| Monthly | Check all lights operate; clean lenses if needed |
| Quarterly | Inspect base plates, nuts, coatings, alignment |
| Annually | Repair coatings, treat small rust spots |
| After storms | Check for leaning, impact damage, loose fixtures |
Repairing Leaning or Damaged Poles
- Inspect the foundation for cracks or settlement.
- Check anchor bolts for looseness or corrosion.
- Re-tighten nuts to the correct torque.
- For minor lean, correct with jacks and shims under expert guidance.
- Replace any pole that is visibly bent or structurally compromised.
Always consult an engineer if you’re unsure about structural safety – especially after vehicle impact.
Mistakes to Avoid in Light Pole Installation
Some mistakes cost money. Others become safety incidents. All can damage your reputation.
Avoid shortcuts like guessing foundation sizes, ignoring wind loads, or rushing electrical work just to save a few hours.
Shallow or Undersized Foundations
Using “rule of thumb” depths without checking structural drawings is risky. Taller poles, soft soils and high wind zones all demand properly designed foundations.
Shallow bases are the most common cause of poles leaning after a few years.
Ignoring Wind Loads and Attachments
Adding banners, cameras or bigger luminaires to a pole increases wind load. If the pole wasn’t designed for that configuration, it may fail under storm conditions.
Always follow the approved pole and bracket schedule, and don’t upsize fittings without approval.
Inadequate Grounding and Protection
Skipping or “making do” with grounding can cause:
- Shock hazards
- Equipment damage
- Lightning-related failures
Use proper ground rods, clamps and tested connections, and follow local electrical code for protection devices.
FAQs About Light Pole Installation
How deep should a light pole foundation be?
Typical foundations are 1.2–2.0 m deep, but exact size depends on pole height, soil and wind load. Always follow the structural drawings.
What spacing should I use between light poles?
For roads, spacing is often 30–50 m; for small paths it can be 10–20 m. Final spacing must be confirmed by a Final spacing must be confirmed by a road lighting design using the actual luminaires and heights.
.
Can I install a permanent light pole without concrete?
Permanent poles should use proper concrete foundations. Direct-burial designs are mostly for smaller, lighter poles in specific applications.
How long does a light pole last?
Hot-dip galvanized steel poles often last 20–30+ years. Aluminum, concrete and fiberglass poles can last even longer in suitable environments.
Conclusion: Turn Installation Knowledge into Easier Projects
Light pole installation is more than a technical task – it’s part of how clients judge your reliability as a contractor.
By:
- Planning foundations correctly
- Choosing poles matched to soil, wind and corrosion conditions
- Using the right tools and safe working practices
- Following a basic maintenance plan
…you can deliver lighting systems that stay straight, safe and reliable for many years.
If you’re preparing for a new project and want to reduce on-site surprises:
-
👉 Explore our light pole and high-mast product options and specifications
-
👉 Send your BOQ or drawings for a quick technical review and quotation
With the right poles, hardware and guidance, your first few installation projects can run smoothly – and help you win the next ones.
