 Skip to content

I’ve spent enough nights under half-finished high mast lights to know — building them looks easy from far away, but it’s not. The pole may stand straight in drawings, but out there, wind, rain, and uneven soil test everything you thought you planned. Over the years, I’ve learned that the real “construction skills” don’t come from textbooks, they come from sweating next to a 30-meter pole that refuses to align.
Overview of High Mast Lights
High mast lights are tall lighting systems, usually from 20 to 40 meters high, used for big open areas — like highways, stadiums, and ports — where normal street lights just don’t reach far enough.
A typical high mast lighting system includes the pole, a lifting frame, floodlights, control box, cables, and foundation. Most people think it’s just a taller streetlight, but it’s not. The wind load alone can twist a poor design.
I’ve seen 25-meter masts used at roundabouts, 35-meter at container yards, and even 40-meter ones at airports. The idea is simple — fewer poles, more light coverage. But once you go taller than 30 m, everything—foundation, wiring, maintenance—gets tricky.
Main Construction Process of High Mast Lights
To be honest, the construction process of a high mast light is long, a bit messy, but if you follow steps carefully, it works.
I usually divide it like this (others may do slightly different):
- Site survey and design layout.
- Foundation excavation and rebar tying.
- Anchor bolt and template positioning.
- Concrete pouring and curing.
- Pole lifting and alignment.
- Fixture and electrical installation.
- Grounding and lightning protection.
- Testing and commissioning.
Every stage looks small, but if you miss one, the next will bite you later. Once we forgot to check bolt alignment before concrete set — lost three days re-drilling. Lesson learned.
Preparation Work for High Mast Light Construction
Before starting construction, we always check site conditions, drawings, materials, and tools. That small effort early saves big trouble later.
Start with the soil — dig one hole, see if water seeps in, if yes, you’ll need drainage. Then, confirm drawings and wind load zone, double check the height and bolt circle. I once got a foundation template wrong by 10 mm; pole base didn’t fit, nightmare.
Materials — check galvanization, rebar size, anchor bolt threads. Tools — crane capacity, torque wrench calibration, and safety harnesses.
Don’t laugh, once a guy forgot gloves while handling bolts in the rain — slipped, nearly cost a finger.
Foundation Construction of High Mast Lights
The foundation decides whether the pole stands ten years or just until next storm.
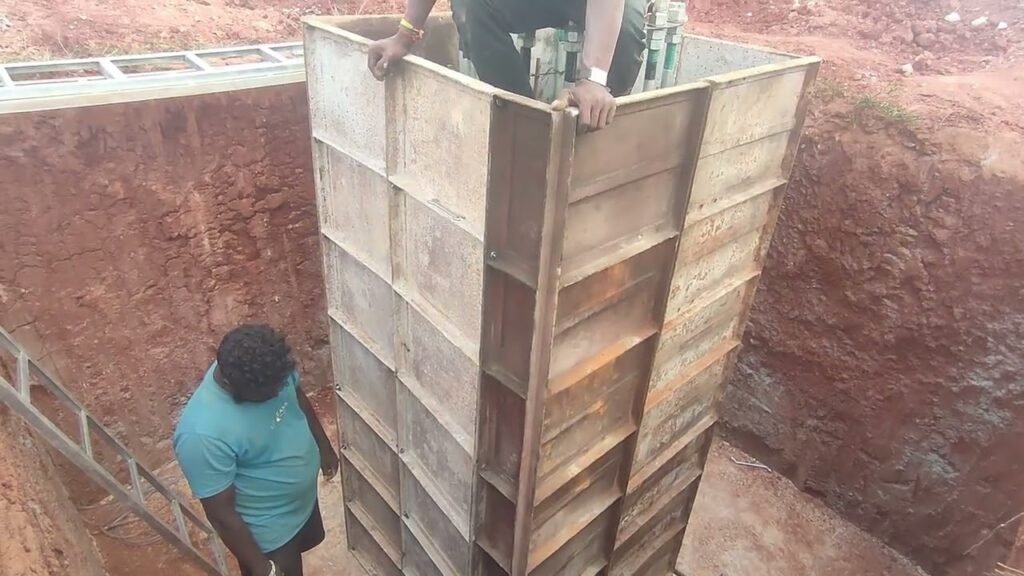
We dig per design, usually 2–3 m deep. Then compact soil, pour a small C15 leveling layer about 100 mm thick. Rebars come next — tie properly, keep right spacing. Anchor bolts must sit dead center; if you’re lazy here, your mast will tilt forever.
Use a steel template to keep bolt vertical. Pour concrete in one go, vibrate gently — not too long, otherwise separation happens. Cover with wet burlap, keep curing for a week at least.
And please, don’t rush to install the pole before the concrete reaches strength. I’ve seen people do that, regret followed fast.
Concrete Calculation for High Mast Light Foundation
For concrete, I don’t rely only on formulas — still, it’s good to know how to check if your mix will be enough.
Formula is simple:
V = L × W × H
So if your base is 2.2 × 2.2 × 2.5 m,
V = 2.2 × 2.2 × 2.5 = 12.1 m³.
But remember, real site conditions add a bit more — I usually prepare 5 % extra because formwork leaks, and concrete never flows perfectly.
Also, coastal projects need bigger foundations; wind load kills small bases first. One in Mombasa cracked after a typhoon because the client insisted “save on concrete.” Never again.
Installation Process of High Mast Light Poles
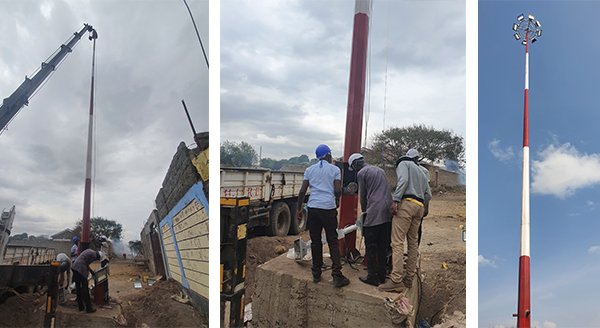
Lifting the pole is the most exciting and dangerous part — looks simple until wind blows.
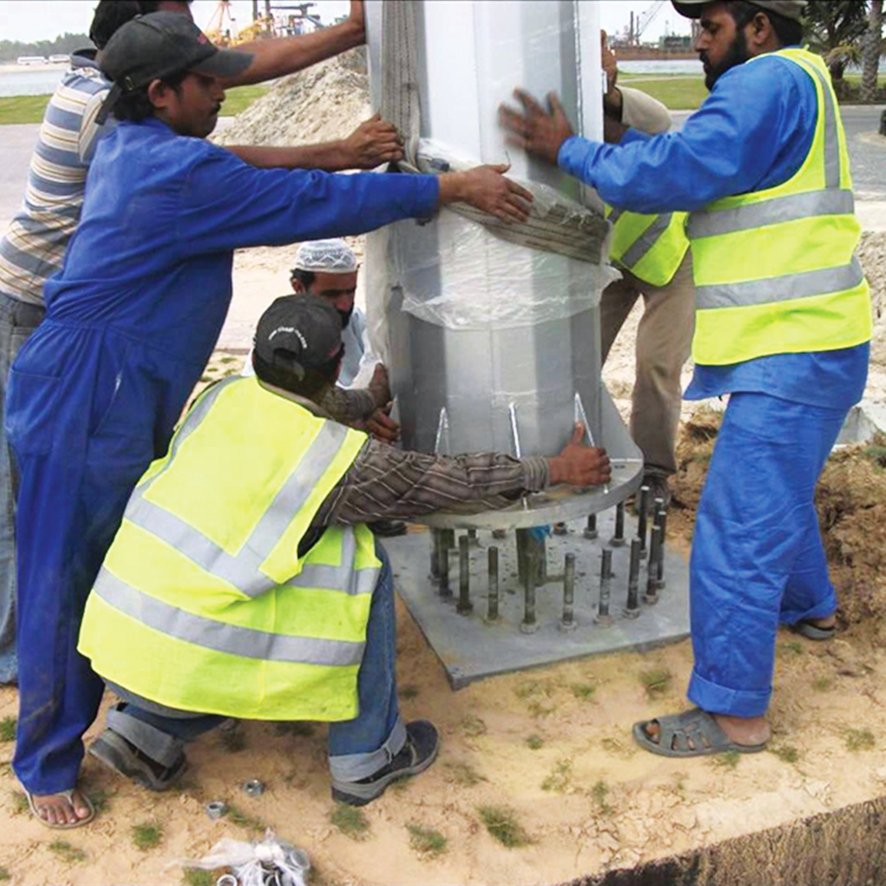
Before hoisting, clean anchor bolts, check nuts, grease threads. The crane should have at least 30 % more capacity than the pole weight. Lift slow and steady, two guide ropes on each side.
When lowering the pole onto bolts, align carefully — never hammer the base, it’ll damage galvanization. Tighten diagonally, check verticality, tolerance less than 1/1000 of height.
We once had to loosen and reset an entire 35 m mast because the crew tightened unevenly. Took half a day, but better than seeing it lean.
Electrical Connection of High Mast Lights
Electrical part always looks easy — just wires and switches, right? No, that’s where most failures hide.
Use armored copper cable (YJV22 or similar). Pass it through conduit, protect entry with rubber grommet. Inside pole, fix cables neatly; don’t let them swing. Connect each floodlight with waterproof plug (IP68 type), then ground everything — pole body, door, even bolts.
Lightning protection is not decoration. Once lightning hit an ungrounded mast in Dar es Salaam, burned all eight drivers. Cost more than the pole itself. Ground resistance below 10 Ω — test it before handover.
Debugging and Acceptance of High Mast Light System
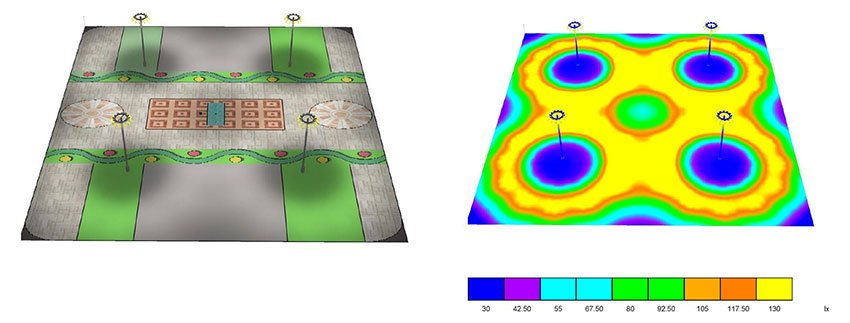
Before handover, we test everything — mechanical, electrical, and lighting performance.
First, check the lifting mechanism: raise and lower a few times, make sure cables don’t twist. Then power up each light; check sequence and control box operation.
At night, measure lux and uniformity. Anything below U₀ = 0.4, we adjust tilt or height.
Don’t forget paperwork — torque records, insulation test, grounding values. The client may never read it, but you’ll sleep better knowing it’s all there.
Safety Precautions for High Mast Light Construction
Safety rules sound boring, until you see what happens when someone ignores them.
I always say: the higher you go, the simpler the rule — tie yourself, always. Cranes must be certified, operators trained. Stop work if wind exceeds grade 5. During wiring, power off completely, no shortcuts.
Once, a helper stood too close during lifting, rope snapped, pole swung — missed him by maybe one meter. Since then, we always use two tag lines and one signal man with radio.
Quality Control in High Mast Light Construction
Quality control isn’t paperwork; it’s every small check that prevents rework.
Inspect materials before use, especially galvanization thickness (at least 85 µm). Test concrete cubes, record bolt torque, measure verticality after 7 days.
Do insulation tests, check grounding continuity, keep a maintenance log.
We revisit masts after one rainy season — if bolts rusty or paint peeling, fix immediately. A good installation is one you don’t hear complaints about for ten years.

