
Designing or upgrading a baseball field's lighting? Getting foot candles wrong leads to poor visibility, safety issues, and wasted money.
Foot candles help ensure the right amount of light is delivered across the field—for visibility, safety, and game compliance. Calculating them accurately is essential for professional-level lighting.
Let’s walk through what foot candles are, how they work in baseball field lighting, and how you can design a compliant and high-performance lighting system.
What Are Foot Candles and Why Are They Important for Baseball Fields?
You can’t improve what you can’t measure. That’s exactly why foot candles matter in sports lighting.
A foot candle is the measurement of how much light reaches a surface. For baseball, it ensures players, officials, and fans can clearly see the game under night skies.
- Definition: One foot candle (fc) equals one lumen per square foot.
- Purpose: Ensures that the entire playing area is evenly lit.
- Impact: Better visibility = faster player reaction, safer movement, and better spectator experience.
- Compliance: Foot candle levels are regulated by standards from organizations like the IES and Little League International.
Inconsistent lighting leads to shadows, glares, and competitive disadvantages. That's why calculating foot candles accurately is non-negotiable.
Standard Lighting Requirements for Baseball Fields
Different levels of play require different lighting intensity—and it’s not just about brightness, but also uniformity.
Baseball lighting standards define different foot candle levels for infield and outfield areas depending on the level of play.
- Infield needs more light due to frequent action and higher-speed movement.
- Outfield requires less, but still consistent, coverage to avoid dark zones.
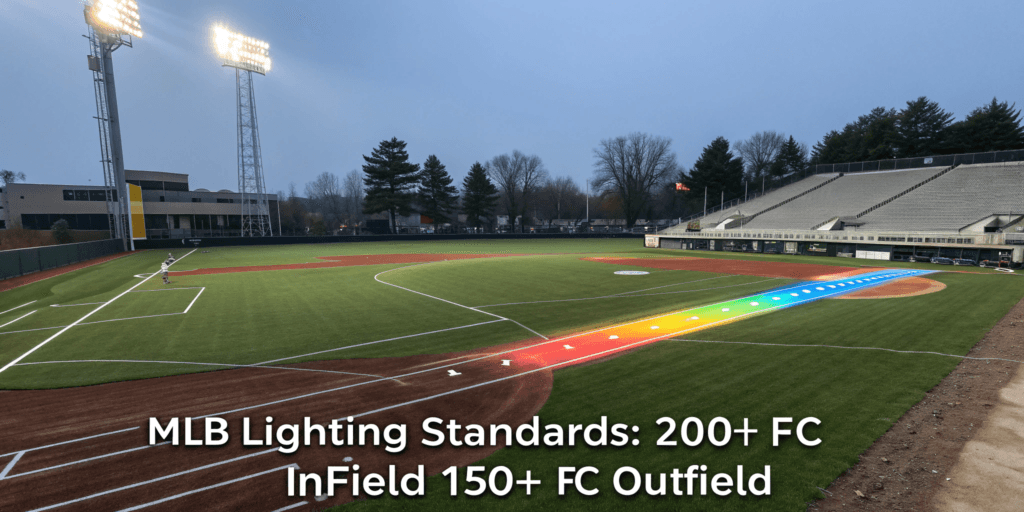
| Level of Play | Infield (fc) | Outfield (fc) | Uniformity Ratio (Avg/Min) |
|---|---|---|---|
| Little League | 30 | 20 | 2.0:1 |
| High School | 50 | 30 | 1.7:1 |
| College | 100 | 70 | 1.5:1 |
| Minor League | 150 | 100 | 1.4:1 |
| MLB (Pro Stadium) | 200+ | 150+ | 1.4:1 or better |
- Uniformity Ratio: Compares average to minimum foot candles. Lower ratios mean more even light.
- Maximum Rate of Change: Sudden brightness changes must be avoided—glare control and beam angles are used to soften transitions.
Step-by-Step Guide: How to Calculate Foot Candles for Baseball Fields
You don’t need to guess. Here’s a clear, step-by-step approach to calculate lighting levels using basic data and real measurements.
Use this formula: Foot Candles = Total Lumens / Area (in square feet).
-
Step 1: Understand Field Requirements
- Know your infield vs. outfield lighting goals.
- Check applicable league standards.
-
Step 2: Gather Measurements and Fixture Data
- Measure total area of infield/outfield.
- Collect lumens rating from fixture spec sheets.
- Note beam angle, mounting height, and tilt.
-
Step 3: Apply the Formula
- Example:
- Area = 6,000 sq ft (infield)
- Lumens = 300,000 lumens total from fixtures
- Foot Candles = 300,000 / 6,000 = 50 fc
-
Step 4: Validate with Simulation
- Use DIALux or AGi32 to simulate coverage.
- Adjust aiming and layout as needed.
For accuracy, never rely solely on manual calculation. Simulations show intensity, spread, and blind spots clearly.
Lighting Design Considerations Beyond Foot Candles
You’ve calculated foot candles—but that’s just the start. Good lighting design needs more than just brightness.
Uniformity, glare control, pole layout, and mounting height all work together to deliver professional-grade baseball lighting.
-
Uniformity Ratio
- Target ratio for baseball: 1.4:1 to 2.0:1
- Avoid over-lit zones or sudden drops in brightness.
-
Glare Reduction
- Use fixtures with shielding and precision optics.
- Angle fixtures to avoid direct glare into player or spectator lines of sight.
-
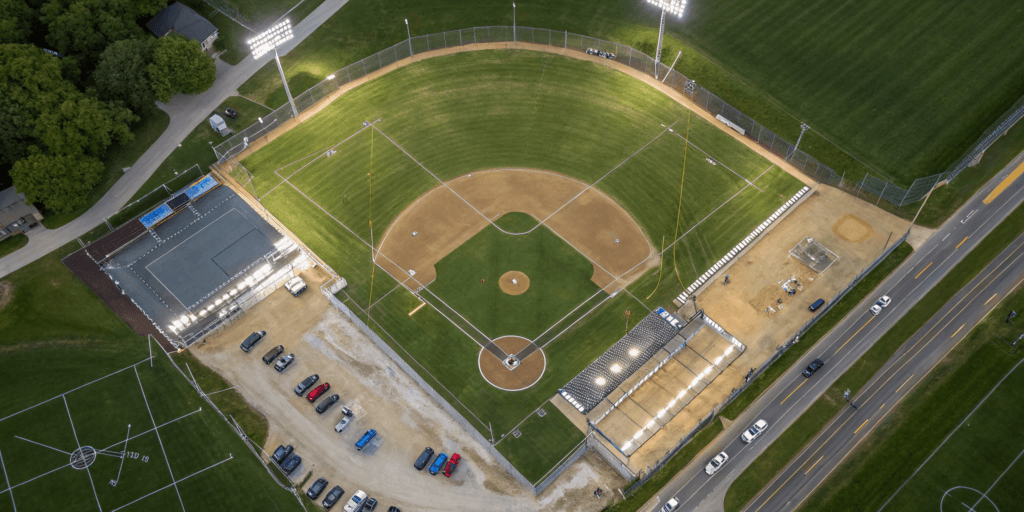
Mounting Height
- Infield: 60–70 ft above ground
- Outfield: 80–100 ft
- Higher poles help avoid shadows and overlap beams better.
-
Pole Layout
- Optimal: 8-pole system (4 per side)
- Place poles outside foul lines and beyond outfield fence
- Ensure overlapping coverage zones for zero dark spots
Poor layout = uneven lighting, blind spots, and complaints. That’s why design should always be part of your planning phase.
Why LED Fixtures Are the Best Choice
Still considering metal halide lights? It’s time to upgrade—LEDs offer better performance across the board.
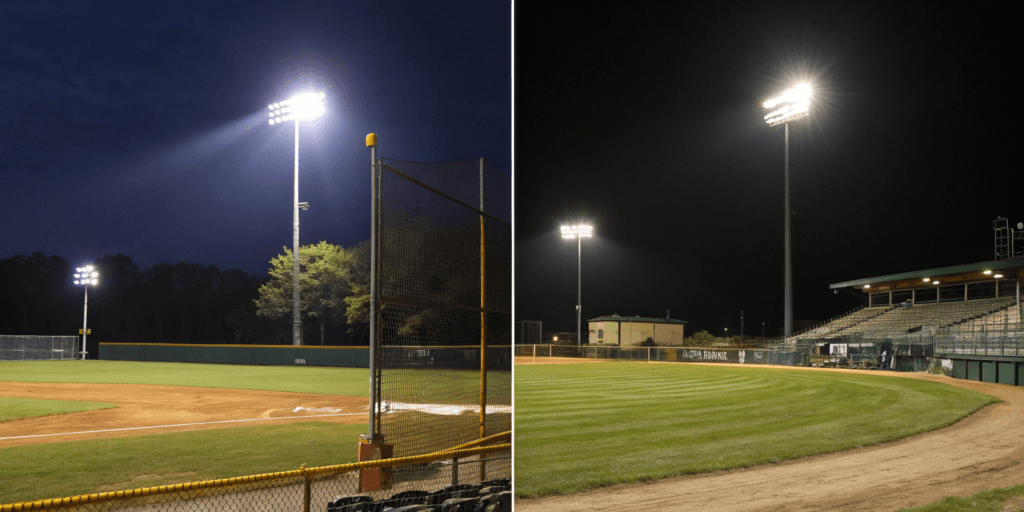
LED lighting is the most energy-efficient, durable, and controllable solution for baseball field lighting today.
- ✔ Energy Savings: Up to 70% less power consumption
- ✔ 50,000+ Hours Lifespan: Reduced maintenance and fewer replacements
- ✔ Instant On/Off: No warm-up needed like HID
- ✔ Beam Control: Advanced optics allow precise targeting and uniform spread
- ✔ Dark Sky Compliance: Reduced upward spill light for environmental friendliness
- ✔ Smart Controls: Dimming, scheduling, remote monitoring via IoT
LED systems outperform legacy lighting in energy use, reliability, and control. They’re also easier to maintain and adapt to new compliance standards.
Using Photometric Analysis to Plan Your Lighting System
Before you buy fixtures or install poles, do this: run a photometric simulation.
Photometric analysis lets you model your entire field lighting system—eliminating guesswork and costly mistakes.
-
What It Does
- Visualizes where every lumen goes on the field.
- Shows coverage patterns, glare risk, and brightness levels.
-
Why It Matters
- Confirms compliance with standards.
- Helps avoid overspending on unnecessary fixtures.
- Supports better fixture positioning and aiming.
-
Tools Used
- DIALux, AGi32, Visual Lighting Tool
Simulation ensures your foot candles aren’t just “correct on paper” but effective in real-world performance.
Post-Installation Evaluation and Adjustments
Installation complete? It’s not over yet—test and fine-tune your lighting system.

Measure actual foot candles on the field, compare to your design specs, and adjust angles or brightness as needed.
-
Tools: Use a calibrated lux meter (1 fc = 10.76 lux)
-
Measurement Points: Sample at multiple grid points—especially transitions between zones.
-
What to Look For:
- Spotty or uneven lighting
- High glare zones
- Underlit corners or foul territories
-
Fine-Tuning Tips:
- Slightly adjust tilt angles of fixtures.
- Replace or reposition fixtures if coverage gaps appear.
- Use smart dimming profiles to reduce energy during non-game hours.
Post-installation evaluation is the final step that separates a good lighting system from a great one.
Conclusion: Get Lighting Right with Expert Support
Baseball field lighting is part science, part strategy. Proper foot candle levels, uniformity, glare control, and pole layout all work together to create the ideal playing experience.
Don’t just install lights—design a system.
Need Help? Request a Free Photometric Consultation
Send your field dimensions, level of play, and lighting goals. Get a tailored simulation with foot candle mapping, layout design, and fixture specs—at no cost.
🎯 Better lighting. Safer games. Lower cost.
